Suffering from back pain? Don’t let it hold you back! Whether it’s caused by sitting at a desk all day, exercising, or an injury, back pain can be uncomfortable or even debilitating.
In fact, studies show that 8 out of 10 people experience back pain at some point in their life (1). But back pain isn’t just limited to localized discomfort – if left untreated, it can lead to a range of other issues, such as sciatica, tension headaches, decreased range of motion, decreased coordination and stability, referred pain in seemingly unrelated parts of the body, stomach pain, and pain down the arms and hands.
Discover Effective Relief with Self-Myofascial Release (SMR)
However, there’s good news! If you’re experiencing moderate back pain that doesn’t require surgery, self-myofascial release (SMR) can be a game-changer. In this article, we’ll delve into the impact of back pain and how SMR, a simple and effective technique, can help you find relief and get back to feeling your best.
Self-Myofascial Release (SMR): A Technique for Relieving Muscle Pain and Promoting Circulation
Self-myofascial release (SMR) is a technique used to treat skeletal muscle immobility and pain by relaxing contracted muscles, improving blood and lymphatic circulation, and stimulating the stretch reflex in muscles. Tennis balls are an ideal tool for SMR due to their small size, lightweight nature, and optimal firmness for effectively targeting fascia without causing excessive soreness.
SMR serves two main purposes: releasing fascia and releasing trigger points. Fascia is the connective tissue that surrounds muscles and can become tight, similar to muscles themselves. However, regular stretching may not effectively release fascial tightness, and instead, engaging in yin yoga or SMR can be more beneficial.
Trigger points, on the other hand, are specific spots in muscles often referred to as “knots,” where there is decreased blood circulation, increased contraction, and a buildup of toxins. Trigger points can be either active or latent, with active trigger points constantly causing pain, while latent trigger points are typically pain-free unless touched or pressed.
Understanding Fascia and Trigger Points: Key Concepts in Self-Myofascial Release
Fascia, the connective tissue that surrounds muscles in the body, can become tight and restrictive, similar to muscles themselves. However, regular stretching may not effectively release fascial tightness. Instead, engaging in practices such as yin yoga or self-myofascial release (SMR) can be more effective in loosening this connective tissue.
Trigger points are specific spots within muscles, often referred to as “knots,” where muscle fibers experience decreased blood circulation, increased contraction, and a buildup of waste products. Trigger points can exist in two states: active or latent. Active trigger points cause constant pain in the area, while latent trigger points are typically pain-free unless touched or pressed.
There are two types of trigger point pain: primary and referred. Primary trigger point pain is localized at the tense muscle spot, whereas referred pain is felt in an area away from the trigger point. It is crucial to address the trigger point that causes the referred pain in order to effectively alleviate the issue.
Many individuals who experience mild or chronic pain find that trigger point therapy can help alleviate the problem by improving range of motion. When working on a trigger point, the body undergoes a soft tissue release, allowing for increased blood flow and muscle activation.
To release tight fascia and target trigger points on your back, there are 11 ways to use a tennis ball for self-myofascial release. This can help ease back pain, increase range of motion, and alleviate tension headaches caused by debilitating muscle tension.
Mastering Self-Myofascial Release: Essential Tips and Techniques for Effective Fascia and Trigger Point Release
- Prioritize Body Preparation: Warm up your body beforehand with a brisk walk or jog, or consider applying a heating pad over the areas you plan to work on to promote relaxation and circulation.
- Listen to Your Body: Always pay attention to your body’s cues during self-myofascial release. While releasing fascia and trigger points can be uncomfortable and may cause soreness afterwards, it should be a satisfying kind of pain, akin to the sensation of a deep tissue massage. If it ever feels overly intense, don’t hesitate to stop and adjust the pressure or technique.
- Methodical Approach: Go through each of the 11 moves systematically, checking for tension or trigger points in each targeted muscle. If you don’t find any, simply move on to the next muscle group.
- Gentle and Sustained Pressure: When you come across a point of tension, hold the tennis ball in place and apply gentle but sustained pressure. It’s crucial to avoid using excessive force, and the sensation should be satisfying rather than painful.
- Patience and Deep Breathing: Hold each trigger point for at least 20 seconds or longer, taking slow, deep breaths to help relax the muscles and facilitate the release of tension.
- Proper Finish: After releasing trigger points, remember to stretch the muscles you worked on using static stretching techniques to promote flexibility and recovery.
- Hydrate for Detoxification: To aid your body in flushing out toxins released during self-myofascial release, be sure to drink ample water throughout the process and afterward.
For Lower Back Pain
Prone Psoas Release
The psoas is directly attached to the lumbar vertebrae. When the psoas becomes tight, it tugs on the lumbar vertebrae, leading directly to lower back pain.
- Kneel on the floor.
- Place the tennis ball out in front of you, then lower yourself down onto the ball, belly down, so that it rests between your belly button and the inside of the pointy part of your right hip bone.
- Prop yourself up with your forearms and let your weight rest on the ball. It should feel as though the ball is pressing up and into your abdomen.
- Take some small, slow rolls forward and back. When you find a tender spot, stop and hold for 20 seconds.
- After you feel a release on the right side, switch to the left side.
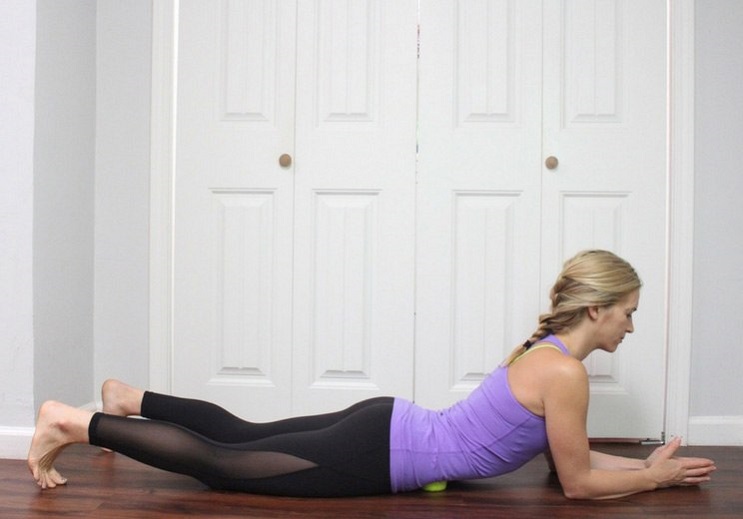
Figure 4 Piriformis Release
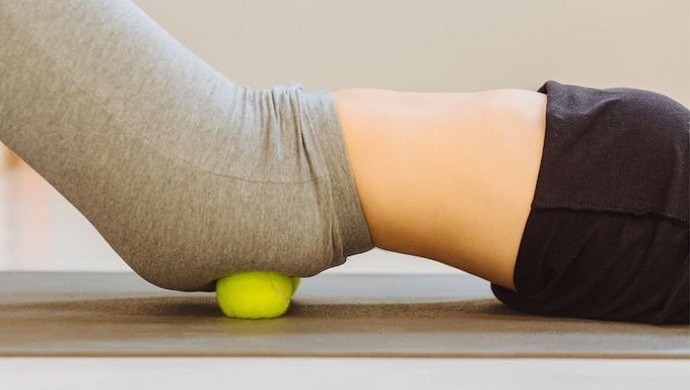
The piriformis is a flat, pyramid-shaped muscle located underneath the gluteus maximus that helps to rotate the hip. When tightened or enlarged, it can entrap the sciatic nerve and other major nerves and blood vessels, often leading to lower back pain and conditions like sciatica.
- Place the ball on the floor.
- Position yourself over the ball so that it rests underneath the outer center of your right glute.
- Keep your left leg out straight in front of you. Bend your right leg and cross the right ankle over your left thigh.
- Take small circular movements around the area, pausing for at least 20 seconds every time you find a knot or feel referred pain.
- Repeat on the other side.
Supine Double SI Joint Release
The SI joint, which is a movable joint connecting the sacrum to the iliac, is an integral part of the pelvis. In women, it can often become tight due to hormonal changes, pregnancy, and the process of labor. Dysfunction in the SI joint can result in lower back and leg pain.
- Lie on your back with your knees bent and feet on the ground.
- Lift your hips and place two tennis balls beneath your pelvis, about 2-4 inches apart.
- Lie still for 60 seconds. You can keep your knees bent, or for more sensation, straighten your legs out in front of you.
- You can play with moving the balls around to target different muscle fibers and find different points of tension.
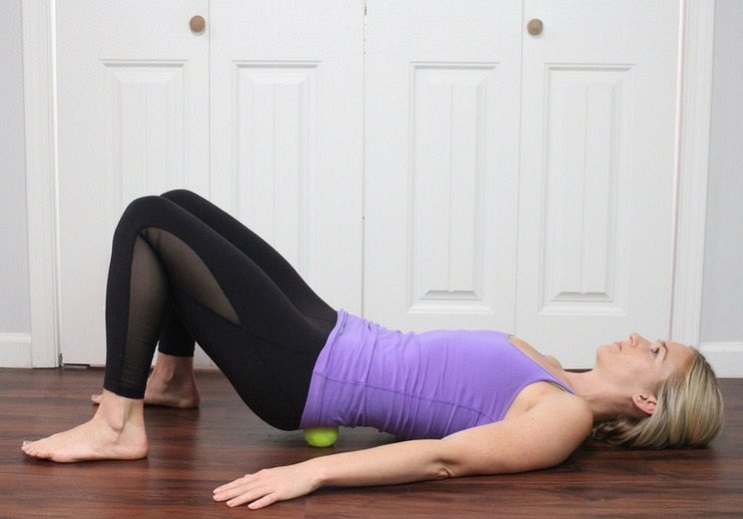
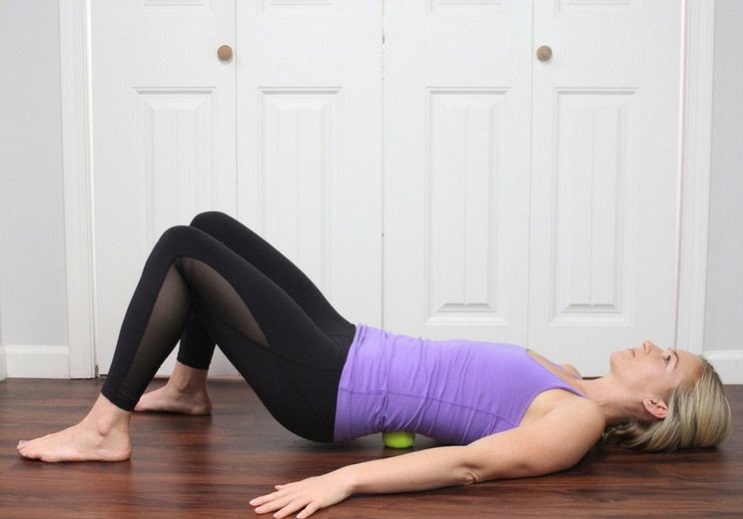
Thoracolumbar Fascia
This fascia envelops the entire lower back area and comprises of an anterior, middle, and posterior layer. It plays a critical role in coordinated movement and stability. Thoracolumbar pain in the low, mid, or upper back can arise due to excessive strain, overuse, repetitive stress, or poor posture.
Thoracolumbar Floor Release
- Sit on the floor and place the tennis ball behind you.
- Use your hands to lower your back onto the ball so that it rests on one side of your back, directly above the hip bone. Bend your knees and place your feet on the floor.
- Use your feet to roll the ball up your back slowly, pausing when you feel a tight spot.
- Repeat on the other side of your spine.
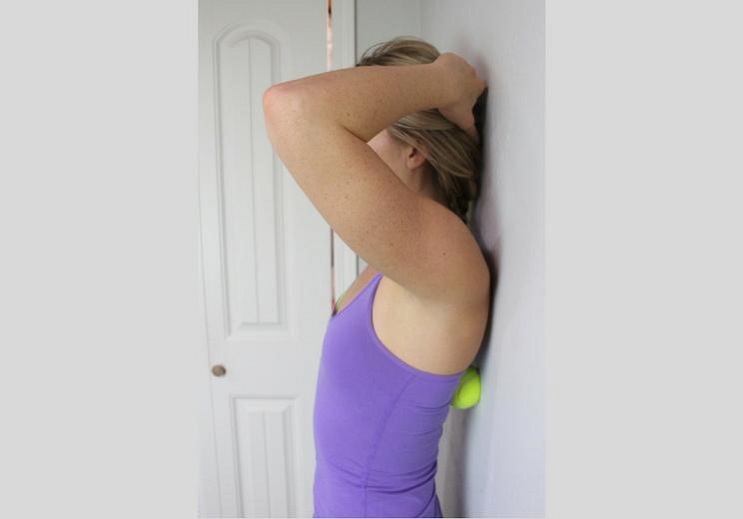
Thoracolumbar Wall Release
- Stand next to a wall.
- Place the ball against the wall, then lean your back against it so that it rests right below your ribs on one side.
- Take small circular rolls, pausing for 20 seconds whenever you find a knot.
- Repeat on the other side.
Mid and Upper Back Pain
Trapezius
The trapezius is a large, diamond-shaped muscle that spans from the top of the neck to the mid-back. Trigger points in this muscle can cause pain in the side of the neck, jaw, and face, and may produce throbbing headaches in the temples.
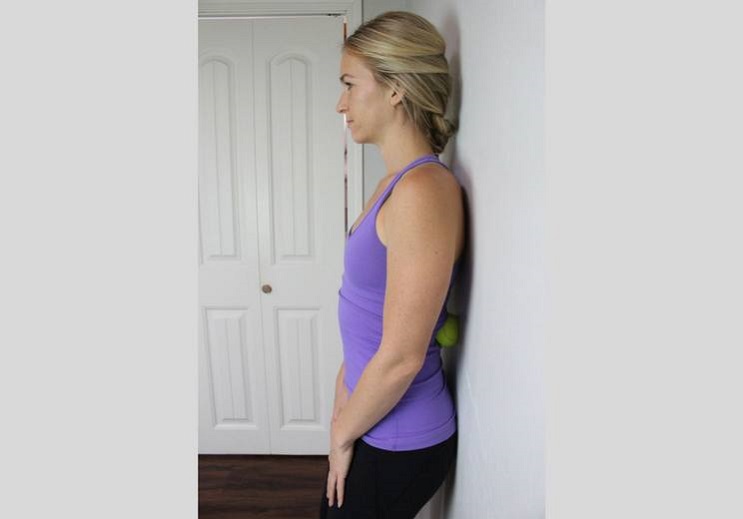
Lower Trapezius Wall Release
- Stand by a wall.
- Place the ball against the wall and lean back against it, positioning it below one of your shoulder blades.
- Take small rolling circles with the ball, searching for points of tension.
- Hold on each point of tension for at least 20 seconds, then continue rolling around the area until you find another spot.
- Once you no longer find any points of tension on that side, repeat the process on the other side.
Mid-Trapezius Supine Rollout
- Sit on the floor with your knees bent and feet flat on the ground.
- Place the ball behind you and lower your back onto the ball, positioning it inside the top of your right shoulder blade.
- Slowly roll the ball down the inside of your right shoulder blade, pausing for at least 20 seconds whenever you encounter a knot.
- Once you reach the bottom of the shoulder blade, roll the ball back up slowly, stopping when you find a point of tension.
- Repeat the process on the other side.
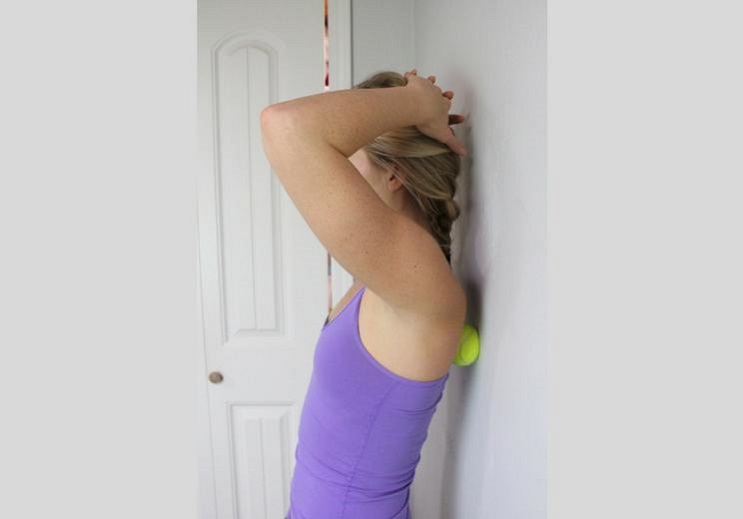
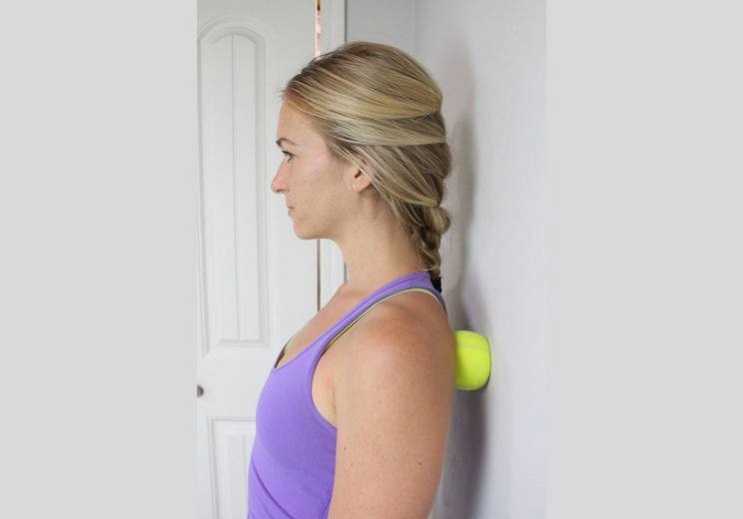
Upper Trapezius Standing Wall Rollout
- Stand with your back towards a wall.
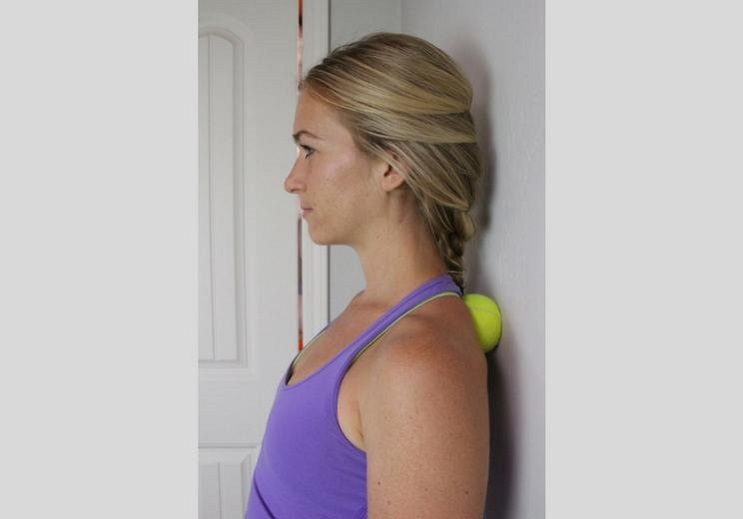
- Position the ball between your back and the wall, placing it on your upper trapezius, between your shoulder and neck.
- Move slowly from side to side, pausing for 20 seconds when you encounter a tight spot.
- Repeat the process on the other side.
Latissimus Dorsi
Your latissimus dorsi is a large triangular muscle that spans across the lumbar and thoracic regions of your back. When this muscle becomes tight, it can cause pain in the mid-back or shoulder blade area. Tight lats can also contribute to stomach and lower back pain, and may even result in discomfort that radiates down the arms and into the fingers.
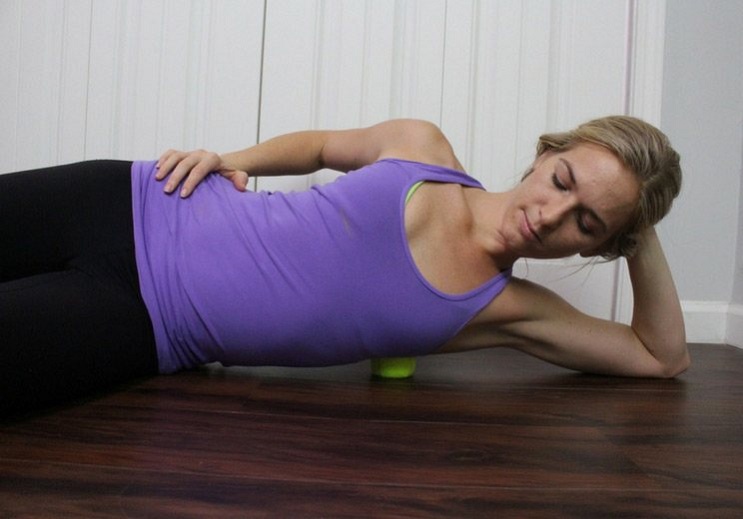
Sideways Lying Floor Release
- Place the ball on the floor.
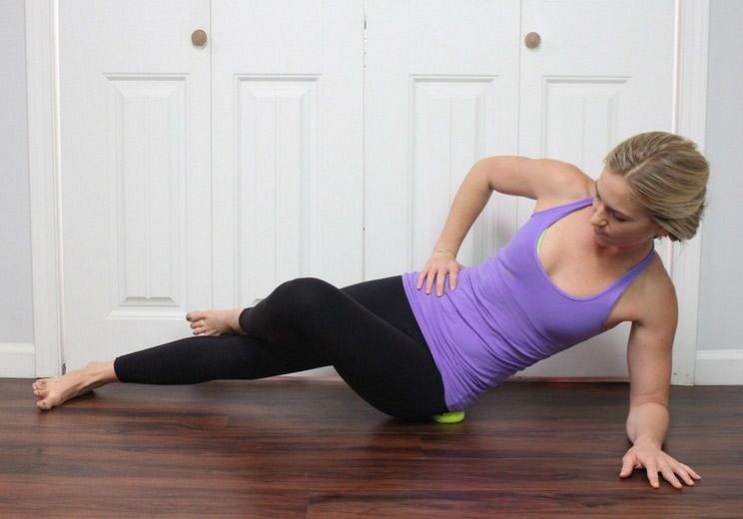
- Sit next to the ball and lower yourself down onto your side, so that the ball rests below your armpit, over the ribs.
- Use small circular movements, pausing when you encounter a tight spot.
- Repeat the process on the other side.
Standing Wall Release
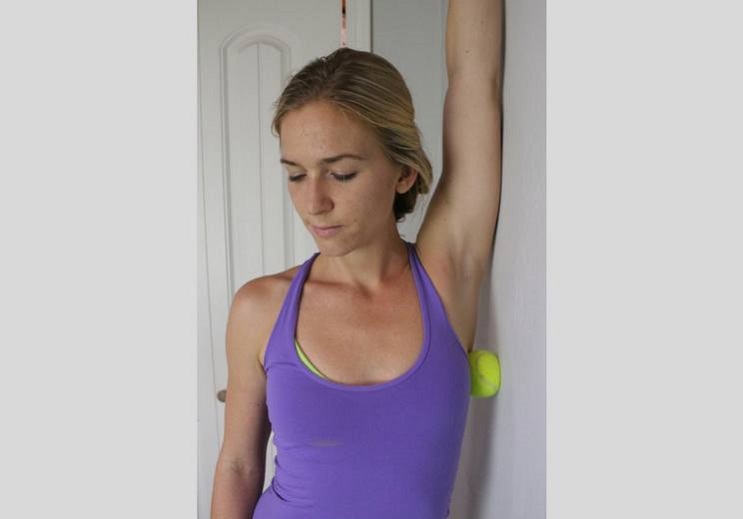
Standing Wall Release
- Stand sideways next to a wall.
- Walk your hand up the wall and position the ball between your torso and the wall, placing it underneath your armpit.
- Use small rolling movements, pausing whenever you encounter a knot.
- Repeat the process on the other side.
Rear Deltoid
Trigger points in the deltoid muscle can cause pain between the shoulder blades, discomfort in the front of the deltoid, and even pain in the upper arm.
- Stand with your back towards a wall.
- Place a tennis ball between the back of your right shoulder and the wall, positioning it just above the right armpit.
- Roll the ball slowly around the area, pausing for 20 seconds when you encounter a tight spot or feel referred pain.
- Repeat the process on the other side.
