In terms of crucial garden herbs, rosemary is near the top.
In addition to its many culinary applications—ranging from roasts to cocktails—this fast-growing, thick shrub also makes for an attractive ornamental. The more of this multipurpose plant you have in your garden, the better.
It’s easy to grow your own by taking cuttings. Even if you don’t have any money, you can get free plants by snipping a few of the neighbor’s stems.
Rosemary: Propagation Steps
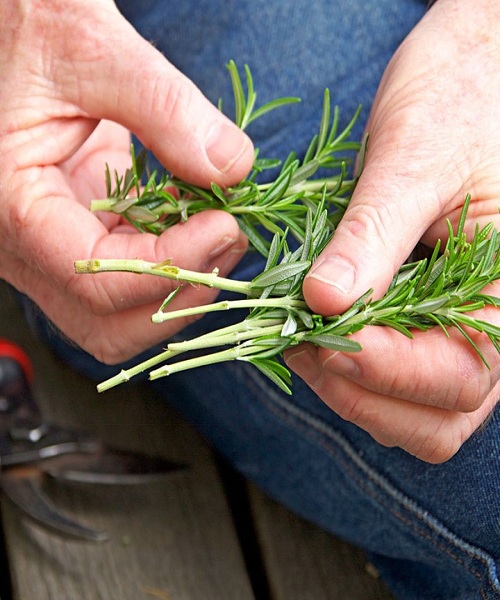
Find a stem
Make sure you have a pair of sharp pruning shears on hand before you begin propagating. Using dull shears might harm the parent plant and prevent it from regrowing properly. Disease transmission can also be avoided by keeping them clean.
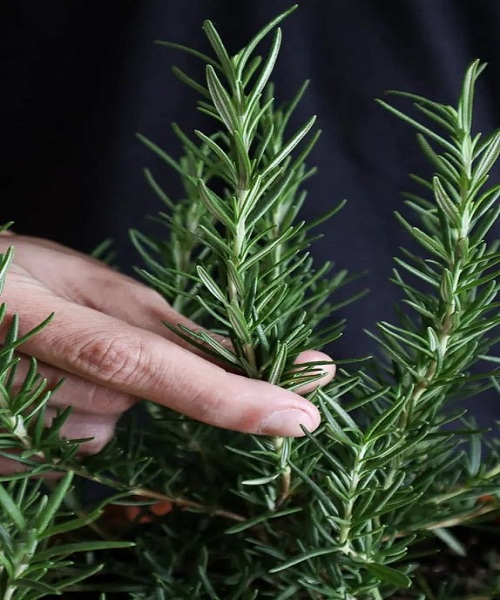
Now, select a stem that appears to be in good health and is actively growing. Instead of the dark green and woody texture of lower stems, upper ones will be a lighter shade of green.
From the node of the old growth, the new stems should break off easily (although snapping them is not recommended).
Leaves that are falling off or stems that are damaged shouldn’t be picked. A robust root system can only be supported by a healthy stem, so focus on the latter.
Make a cutting
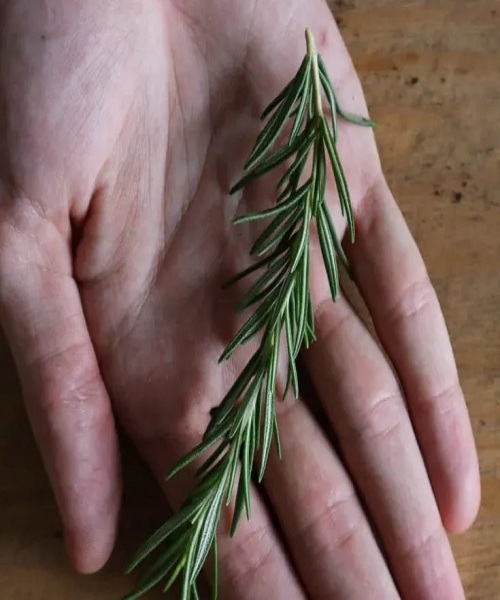
Once you’ve settled on the perfect stem (or stems), you can begin cutting. Take off at least four inches of the stem and make sure you’re cutting into softwood at the base. Before you start spreading the cutting, you should use your shears to get rid of any hardwood there might be on it.
Don’t worry that pruning will leave your plant looking bare. These stems will likely regenerate and possibly even produce new stems after springtime propagation.
Cut the stem at an angle slightly below one pair of leaves. Removal of the stems should be a breeze; if you encounter any resistance, sharpen your shears or select a stem with softer growth.
The number of cuttings you collect is up to you. If there is enough new growth on the plant, three will fit in a pot of medium size. Your rosemary stems can go as long as four inches if you like.
Remove the foliage
Once you have your cuttings, the following step is to prune away the lower half of the plant. When making longer cuttings, discard the lower two to three inches of leaves. Carefully snip these off so as not to break off any of the stem.
Make sure there are at least two inches of leaves remaining at the top of the cut. These leaves are required for photosynthesis, which provides the plant with enough energy to form roots. Without these leaves, the roots can’t grow.
The leaves must be removed to expose the nodes where the roots will emerge. This keeps the leaves from decomposing below ground, where they could attract pests. The exposed areas of the cutting will eventually be buried beneath the earth.
It is also important to prune the cutting of any wasted or still-blooming flowers. These deplete the cutting of vitality that may be put toward root development. At this point, it’s a good idea to remove any diseased or otherwise compromised leaves to get the best possible harvest.
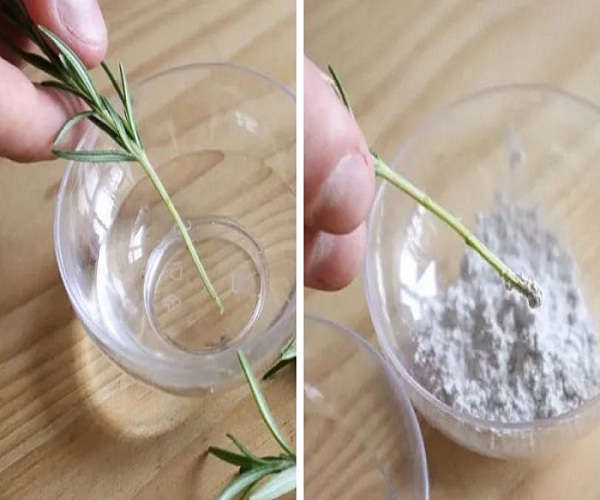
Dip in rooting hormone
Rooting hormone is a powder that makes cuttings of softwood grow roots faster. It’s developed to assist the plant grow healthy new roots while also protecting the wound from bacterial and fungal infection.
Using rooting hormone during propagation is not mandatory. A lot of the time, cuttings of softwood rosemary will root on their own. Nevertheless, it greatly increases the likelihood of roots.
Prepare a rooting hormone powder by dipping the cuttings’ ends in water. Instead of dipping directly into the bottle, it’s best to transfer a tiny quantity to a separate bowl first in order to prevent the spread of bacteria and illness.
Similarly, unused rooting hormone should never be returned to its original container.
Root
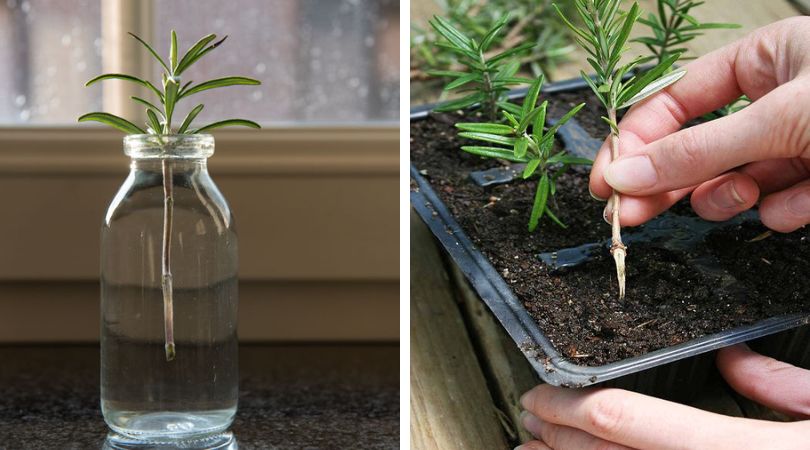
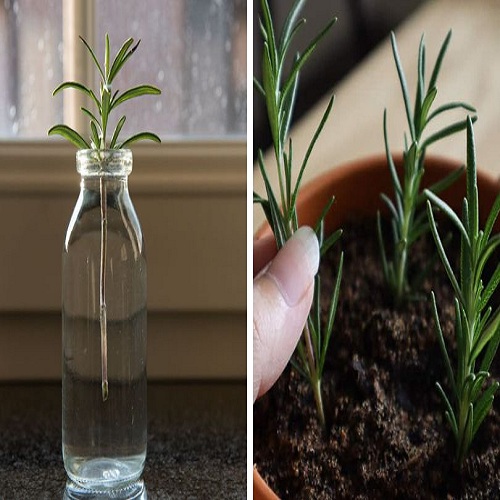
Now comes the fun part: rooting. There are two alternatives here. The cuttings can be rooted in water or planted in soil directly.
- Rooting in water
Cuttings can be rooted in water by placing them in a glass partially filled with water and leaning them against the side of the glass. Only the cut out area should be submerged. To avoid rotting, plant matter must be kept dry.
Invest in a plant propagation station instead of a potted plant grow light to make your green thumb an attractive design element in your home.
When trying to get cuttings to take root, purified water is your best bet. There are many chemicals included in tap water, and some of these might be toxic to cuttings. Water can be boiled in a kettle and cooled for planting if purified water is not available.
The water shouldn’t be ice cold, but rather near room temperature to avoid shocking the organism and to encourage its growth.
If the water becomes cloudy, it needs to be changed frequently to keep it clean. As the water evaporates, you’ll need to refill the glass.
In order to prevent the rotting stems from affecting the growth of the other cuttings, you should remove them from the glass if they have not developed roots after a few weeks.
Once the roots on the cuttings are several inches long, you can plant them in soil. Either transplant them to individual pots so they may flourish indoors, or plant them directly in the garden.
- Rooting in soil
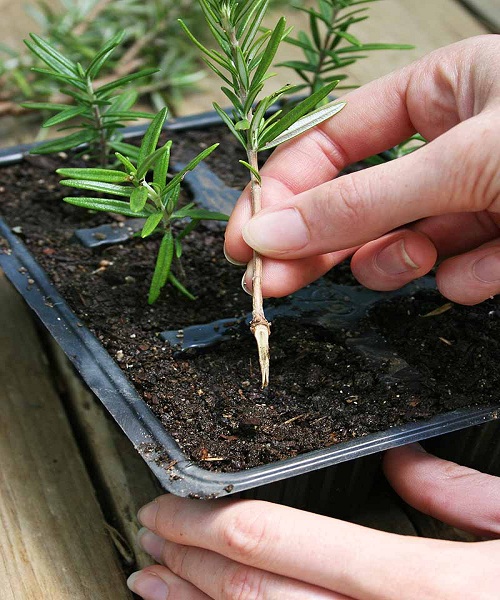
As an alternative, you can set the cuttings directly into soil. This reduces the opportunity to watch the roots grow, but it significantly increases root growth. Water-transplanted cuttings may struggle to establish owing to shock, but soil-transplanted cuttings will be accustomed to the environment.
Leaving the cuttings in a pot for a few months to grow and settle makes the chances of success with the transplant much increased.
Begin by making a propagation mix. coconut coir and sand, divided in half. Coconut coir is a fine, lightweight mixture that enhances root development by facilitating water drainage and oxygen uptake. The cutting can adapt more quickly to its new environment since the sand aids drainage and more closely mimics its new planting site. These materials also contain few nutrients, which is critical for the establishment of young and susceptible roots.
Fill a pot halfway with this mixture and thoroughly moisten with water. Before you plant anything, make sure the drainage holes are completely dry. Press firmly to compact the mixture.
Get out a skewer and some soil and get ready to plant your cuttings. If you want the initial set of leaves to emerge above ground, plant your cuttings so that their bottoms are just touching the earth. Maintain pressure on the area around the cut if necessary.
Put several skewers in the saucepan and set them around the rim. The next step is to use a large, clear plastic bag, such as a sandwich bag, to cover the entire pot. This creates a mini-greenhouse effect, increasing the humidity around the cuttings and so fostering optimal conditions for root development.
Don’t put the pot in direct sunshine, but do leave it somewhere warm. Water the soil regularly to ensure steady development. You will know the cuttings have started to root when they produce new growth and become difficult to remove from the soil.
Transplanting
Successful cuttings can be transplanted after a few weeks have passed. You can either transplant the cuttings into a pot with potting soil that drains properly, or you can plant them directly in the garden.