This modern, modular garden project works well in any space. Because it uses wood containers, you don’t have to worry about the quality of your existing soil, and they can sit on any surface: grass, concrete, gravel or even a wooden deck. The garden’s vertical orientation lets you grow a whole bunch of veggies, herbs, and flowers in a tiny footprint.The boxes are customizable to fit your space – all you need is solid wall or fence to attach the structure to, and you can put this guy anywhere.
Tools and Materials:
- Miter or circular saw
- Cordless drill and 1⁄8 inch drill bit
- Staple gun and 1/2 electric cord staples
- Hammer
- Tape measure
- Gloves
- Safety glasses and dust mask
- Pencil
- Scissors
- Tin snips or cutting pliers
- 3x 8′ long cedar 1x8s
- 4x 8′ long cedar 1x3s
- 16x 8′ long cedar 1x2s
- 1 roll of wire hardware cloth, 1/2″ gap
- 1 roll weed blocker fabric

Building the Boxes:
I built my project out of “one-by” cedar material. Since my garden was going to be outside, I knew it would have lots of contact with water and direct sunlight, so I selected cedar for its natural decay-resistant properties. I would never use pressure-treated lumber for this, as it contains chemicals that will leach into the soil where my edibles are growing.
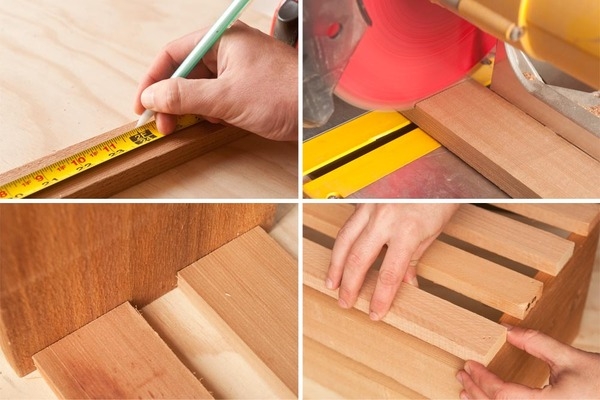
The main boxes measure 10″ high by 23″ long and 7 1/4″ wide. The sides are made from cedar 1x8s, cut to 10″. Two cedar 1x3s make up the base, 21 1/2″ in length, to give the bottom strength. Note that this is not a solid bottom, so that the soil can have proper drainage. The 1x3s are spaced evenly across the bottom.
The slats on the sides are made from cedar 1×2 material, cut to 23″. This size allows you to use an 8′ 1×2 to cut 4 slats for the front, while allowing for waste from the saw kerf. Be sure sure to place them flush with the top and bottom of the box, hiding the 1×3″ base when viewed from the front. Just space them evenly by eye, about 1 to 1 1/2″ apart. Attach them with 1 1/2″ long #8 decking screws. Because you’re screwing so close to the edge of the wood, you’ll definitely want to drill pilot holes to prevent splitting the wood.
To give the covered boxes a little more space, the center boxes are 12 3/4″ tall, and use five slats to make up the front and back.
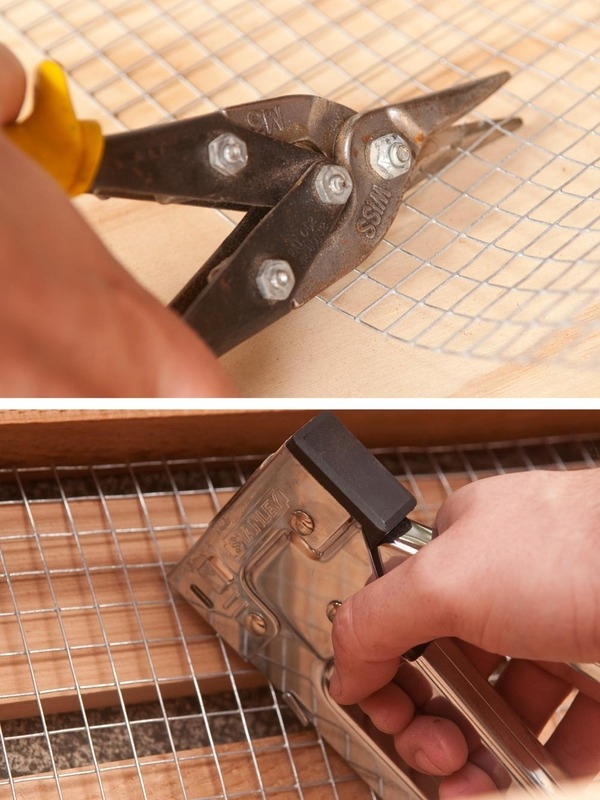
Once your boxes are assembled, cut 1/2″ mesh hardware cloth using snips or cutting pliers, and staple it to the 1×3″ base to make up the bottom of the boxes.
Then, line the sides and the bottom with weed barrier cloth. This is, admittedly, the hardest part, as the cloth is stretchy and can be a bit unwieldy. Start by cutting the weed barrier to length, leaving an extra inch or so on each side. Then, to figure out the length, wrap it around the outside of the two sides and the bottom, like you would when wrapping a gift. Cut to size, then staple to the top slat of one side, and work your way down the bottom, across, and up the other side, using lots of staples to keep things taut.
Assembling the Structure:
Begin by placing two of the shorter boxes on the ground, and add a taller box to span the gap. Once you’re happy with their placement, screw them to the backing material (the fence, wall, or what have you).
The boxes are supported with a simple L-shaped riser. It’s cut to the same height as the taller boxes – 12 3/4″ – and is a piece of 1×8″ with a 1×2″ screwed perpendicularly to the back. This gives is a face to screw into the wall. Line it up carefully with the bottom box, and attach.
Continue to build your structure until all the boxes and risers are attached and secure. Then, fill them with potting soil, and add your plants.


