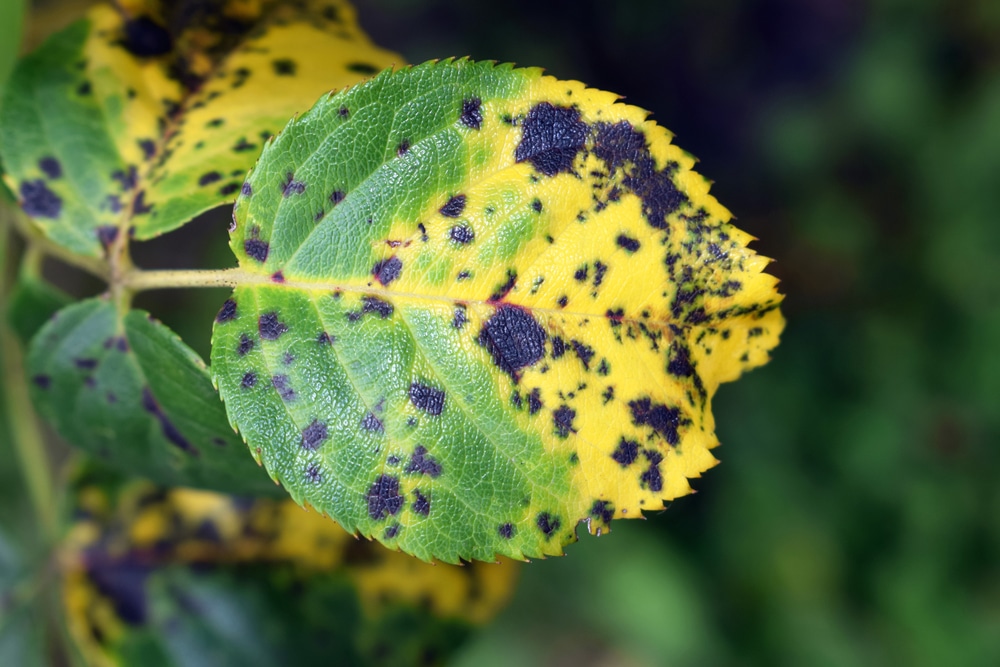
You’re strolling through your garden enjoying the lush growth the spring rains have produced. You stop to admire one particular specimen and you notice black spots on plant leaves. Closer inspection shows black spots on leaves throughout a whole section of your garden. This can’t be! You don’t have any roses. Unfortunately, you don’t need them. Your garden has been infected with black spot fungus.
What is Black Spot Fungus?
Don’t let the name fool you. Diplocarpon rosae, or black spot fungus, isn’t just a disease of roses. It can attack any plant with fleshy leaves and stems if the conditions are right. You’ve already taken the first step in treating black leaf spot. You’ve been inspecting your garden on a regular basis and you’ve caught it early.
Black spot fungus begins to develop in the spring when temperatures reach into the sixties and the garden has been continuously wet for six to nine hours. By the time temperatures reach into the seventies, the disease is running rampant and won’t slow down until the daytime temperatures rise above 85 F. (29 C.). It starts with tiny black spots on leaves, no bigger than a pinhead. As the fungus develops, those black spots on leaves are ringed with yellow. Soon the entire leaf turns yellow and falls.
Treating Black Leaf Spot Fungus
Getting rid of black leaf spot must be a two-pronged attack. Because its spores travel on the wind and plash from leaf to leaf during watering, treating black leaf spot should be first on your agenda.
There are several good fungicides on the market, several of which claim to be organic. They come in handy bottle sprayers, but if your garden is large, you might want to buy it as a concentrate to mix in your tank sprayer.
Neem oil is another alternative for treating black leaf spot. It’s an oil pressed from an evergreen tree. It’s all natural and has shown some remarkable results as an effective garden fungicide.
For those of you who prefer Grandma’s solutions to garden problems, try this: Mix one heaping tablespoon of bicarbonate of soda (baking soda) into a gallon of water for your sprayer. Add a dash of horticultural oil or horticultural soap and Voila! You have a method of treating black leaf spot that works by changing the pH on the leaf surface to one the fungus can’t survive. The oil or soap makes the solution stick and the cost is around four cents a gallon.
The next step in getting rid of black leaf spot is prevention and maintenance. The first, we already talked about. Inspect your garden regularly in the spring. Black spots on plant tissues will spread quickly. Start preventative spraying before the temperatures hit sixty. Read the label directions for the method you choose and follow it closely. For Grandma’s recipe, a light weekly dose should be sufficient. Continue spraying until temperatures are hot enough to get rid of black spot fungus without it.
Avoid watering your plants on cloudy days. Bright sun and good air circulation are essential for getting rid of black leaf spot.
During an outbreak, all affected debris should be disposed of. It may not be ideal as far as looks go, but affected plants should be cut back, and in the fall every bit of garden debris should be thrown away or burned. The spores can overwinter on plant material, but can’t survive in bare soil.
The good news is that black spot fungus rarely kills the host plant. Getting rid of black leaf spot takes a lot of diligence, but in the end, the rewards are worth it.
