If you spend a lot of time in your car (and frequently transport food, children, and/or pets), it probably gets pretty dirty, pretty fast. An expert detailing job can make your car look and smell like new again, but it won’t come cheap. Fortunately, many auto detailing tasks are simple enough that you can do them yourself and save a bundle.
If you value a clean car free of crumbs from Goldfish crackers, pet hair, and melted crayons, but dislike spending a lot of money, you can perform a DIY car detail with ease and affordability by learning car detail secrets.
Detail every day
The best way to save money on car detailing, according to professionals, is to avoid letting your vehicle get so dirty that it begs for costly assistance. It’s a well-kept secret that maintaining a clean, pleasant-smelling interior can be done with little effort or expense.
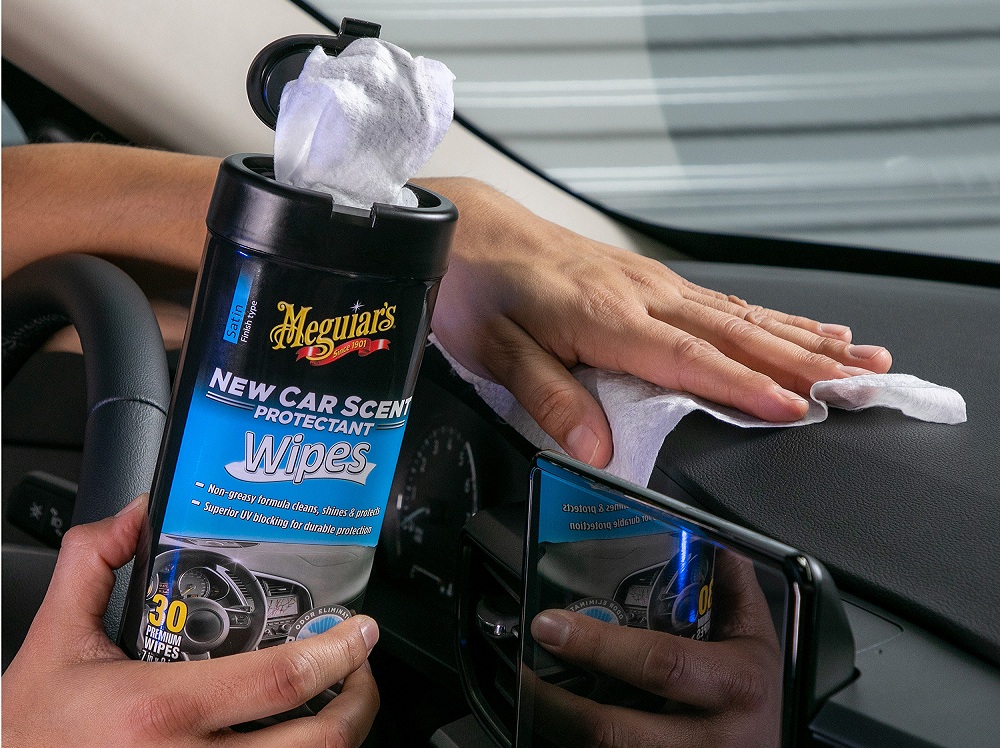
Pick up a tube of Meguiar’s New Car Scent Protectant Wipes to keep in your trunk to bring back that “new car” smell and protect your car’s interior surfaces. Next, once a week or so, pull one out and inspect your car thoroughly.
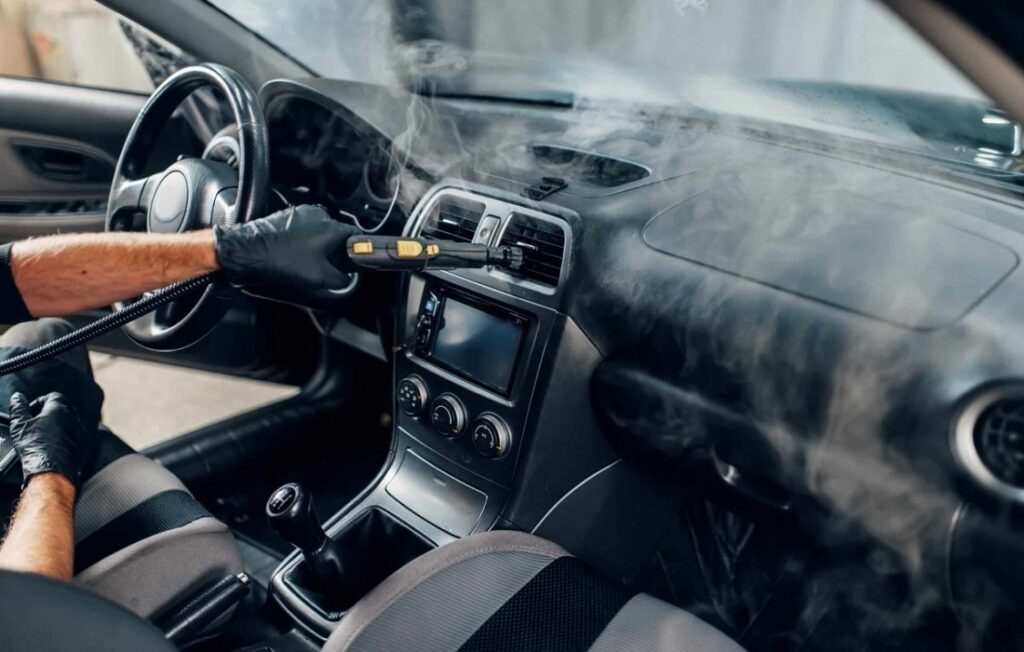
Steam clean it yourself
Use a handheld steam cleaner on your carpeted floor mats and fabric car seats to achieve the same level of cleanliness as a professional auto detailer. Fabric restoration is possible without hiring a professional; however, you should wait until the rest of your vehicle has been detailed before tackling it.
A variety of surfaces can be returned to their spotless, initial state using the chemical-free handheld cleaning system from PurSteam, which comes with a nine-piece accessory set.
Use a plastic bag
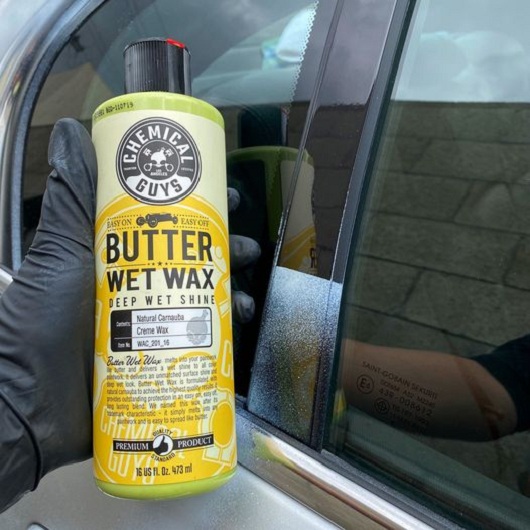
Before applying a coat of wax, you need to inspect the paint to make sure all dirt and abrasions have been removed. But how can you do this without leaving a fingerprint trail? A plastic bag is recommended by Holts Auto. A regular plastic bag from the supermarket can serve the purpose. Just reach in and feel around the car’s exterior. You’ll be able to feel for any remaining bumps and dirt without leaving fingerprints on the exterior. You can now apply wax to your car to make it shine. Test out the Butter Wet Wax by Chemical Guys for high-quality results.
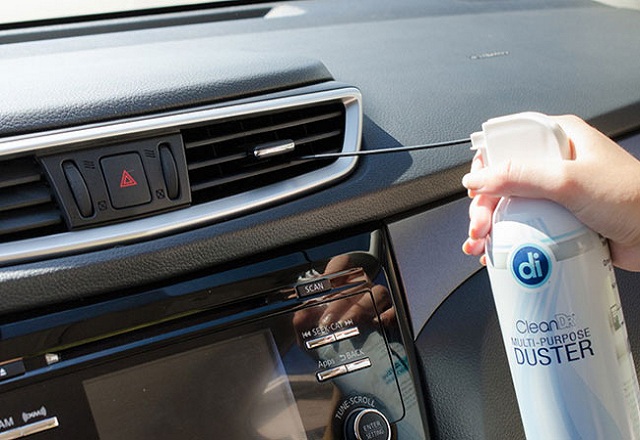
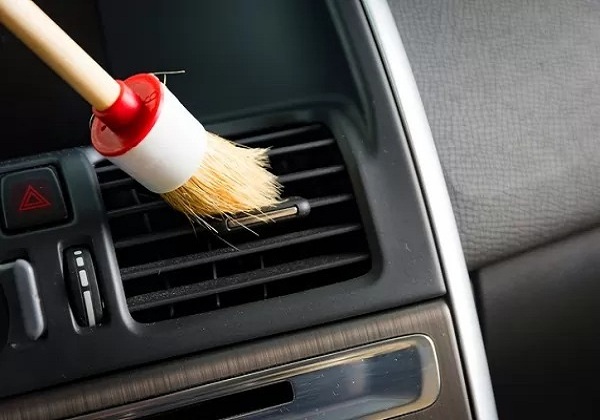
Blow out the vents
Your car’s air vents will look, feel, and smell better after being detailed. Use a can of compressed air to make quick work of this step in your do-it-yourself car detailing project and achieve professional results. As time passes, dust, dirt, and even moisture congregate inside air vents. This can lead to unpleasant odors being blown into your car through the vents.
When the air conditioner and heater are on, a can of Falcon Dust compressed air will eliminate most of the odor.
Don’t forget your tires!
The four tires on your car are, along with the brakes, the most crucial component. They are also the most exposed to the elements because of their proximity to the road. When doing a DIY detail job on your car, don’t forget about the tires if you really want to see results. For this task, you’ll need a tire cleaner and a sturdy brush.
If you want your tires to look like new, a pressure washer can help, but for a truly professional clean, it’s worth it to invest in an ergonomic wheel and tire brush that comes with a bonus scratch-free detailing brush made without metal parts or long bristles.
If you don’t want to take the time to scrub your tires by hand, you can buy a bottle of Black Magic No Scrub Wheel Cleaner, spray it on, and the dirt and grime will disappear as if by magic.

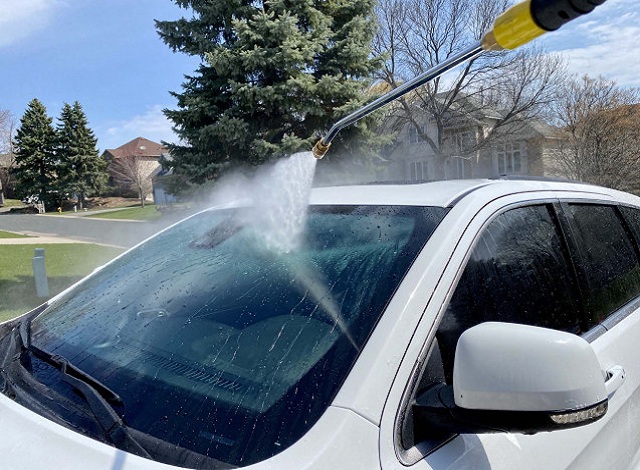
Rinse before washing
If you wash your car with soapy water before giving it a quick rinse with clean water, you risk grinding dirt and road grime into the paint. Not doing this is a big mistake. Before beginning any cleaning process, a professional detailer will always give the vehicle a quick rinse with clean water to remove loose debris and dust. The Sun Joe pressure washer is great for both the preliminary rinse before applying soap and the final thorough cleaning afterward.
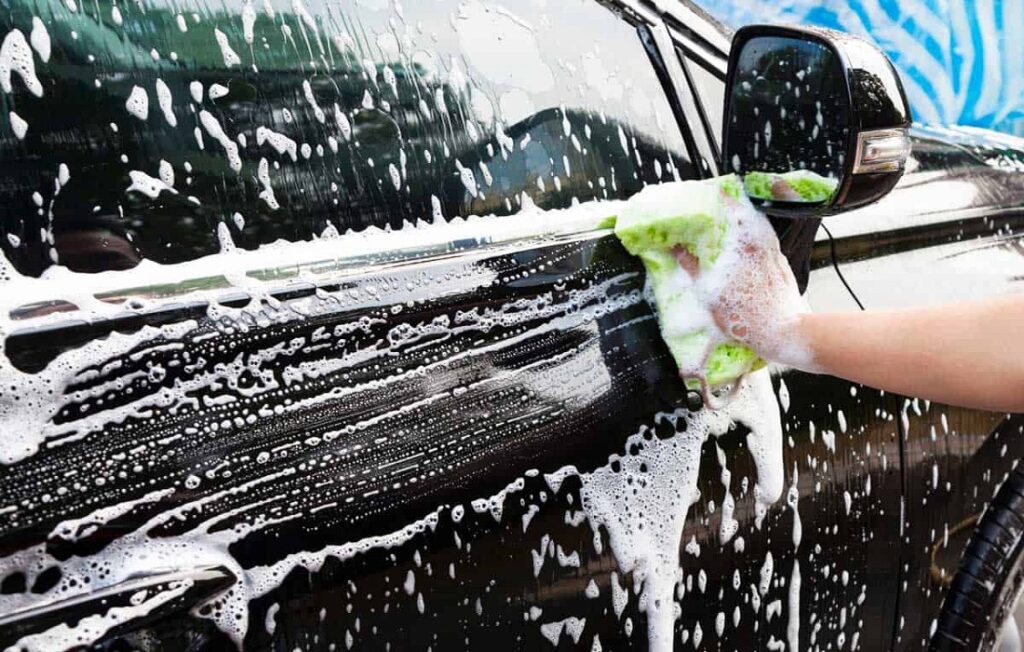
Always use the proper soap
Most do-it-yourselfers use dishwashing liquid. But that just isn’t right. The detergent used in dishwashers is far too abrasive. It removes protective oils from your car’s finish, which can reduce the paint’s durability. Any professional car cleaner would confirm that!
In order to clean your car thoroughly without leaving any spots behind, you should use the ultra-sudsy Mothers California Gold Carnauba Wash. Your vehicle will shine and have its wax boosted, all for a DIY-friendly price.
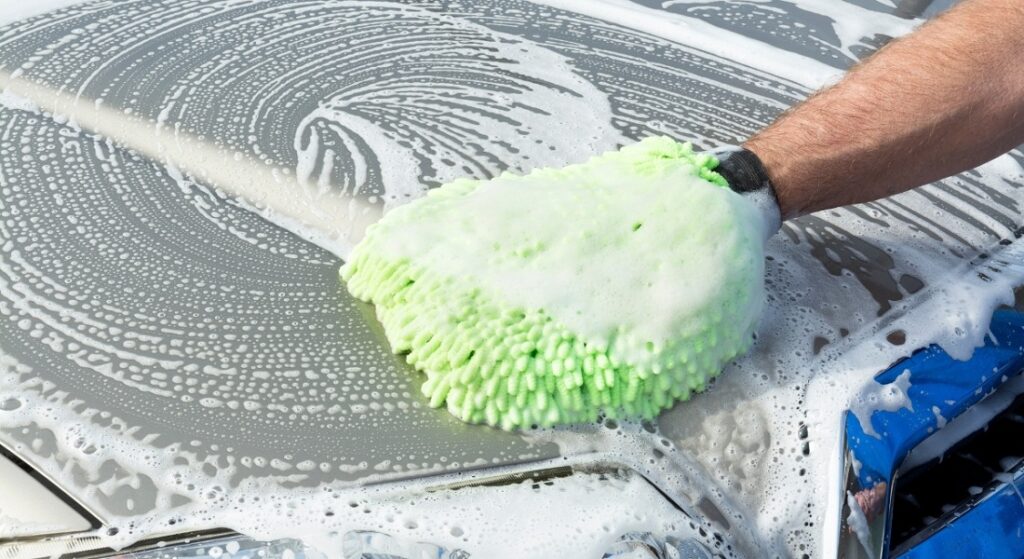
Replace your sponge with a microfiber mitt
The large pores in sponges allow them to absorb and store grime and dirt. You can squeeze the water out of them, but the grit will remain. And if you use a sponge with grit embedded in it to wash your car, you might as well use sandpaper. Car detailers, however, prefer to use a microfiber car wash mitt, as the grit is easily removed during the rinsing process. You should switch to using microfiber cloths for cleaning if you haven’t already.
The MCIGICM Car Wash Mitt Sponge Glove is an inexpensive alternative to using sponges. If you’re doing a DIY car detail, this large, soft microfiber mitt will protect your vehicle from scratches. And because it can be washed in a machine, it will be ready to serve you again and again.
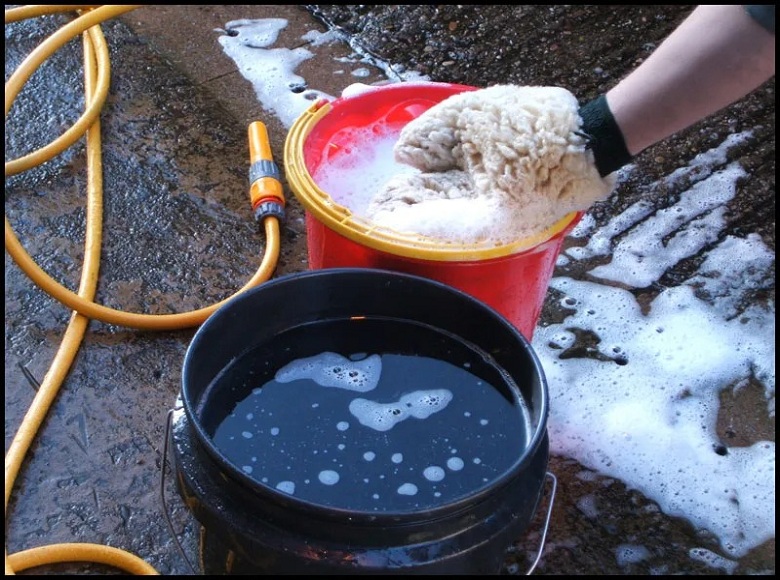
Use two buckets
Two separate containers, one for dirty water and one for clean soapy water to rinse the dirt off. The dirty wash mitt should be dunked into the rinse water bucket between wipes, where it should be swished around to loosen any remaining grime. Soak it in the soapy water and continue where you left off.
Before you move on to the other side of the car, you should empty the used rinse water and replace it with fresh water. Keep the soapy water contained in that way and it will remain clean.
Grab a couple of these Meguiar’s 3.5-gallon buckets to keep your soapy water and clean water separate during your next car detail in the driveway.
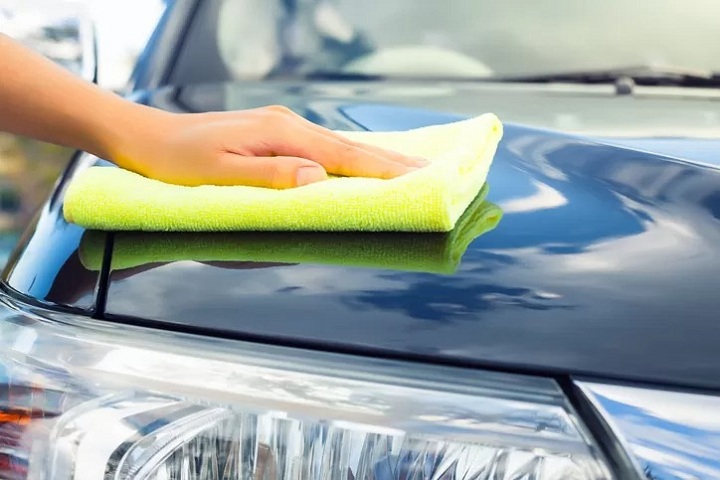
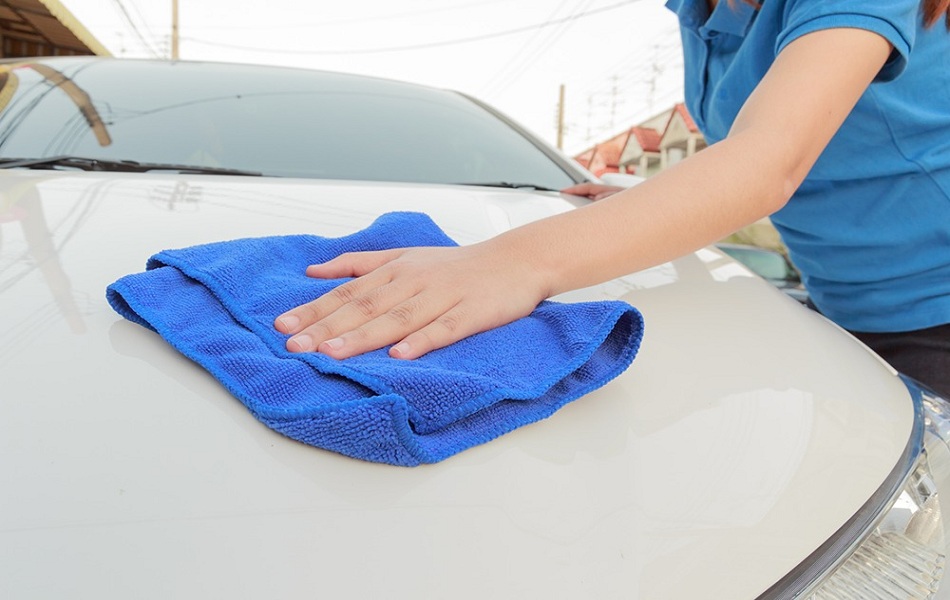
Put away the chamois and grab a microfiber towel
Chamois are excellent absorbents, but they won’t pick up any dirt or grime that remains after a good rinse. They simply grind the particles into the paint, which is much less noticeable. Dust, on the other hand, can be removed with a microfiber towel.
To get rid of the dirt and grime, just rinse the cloths in clean water. Next, squeeze the water out and keep drying. Cleaning with a microfiber cloth is not only more effective than using traditional cotton towels, but it can also be reused (just not in the dryer).
If you want to do some DIY detailing, we recommend picking up a 24-pack of AmazonBasics microfiber cloths. These microfiber cloths are so soft and gentle that they can absorb eight times their weight without feeling damp, and they leave a streak-free shine on your car’s exterior.
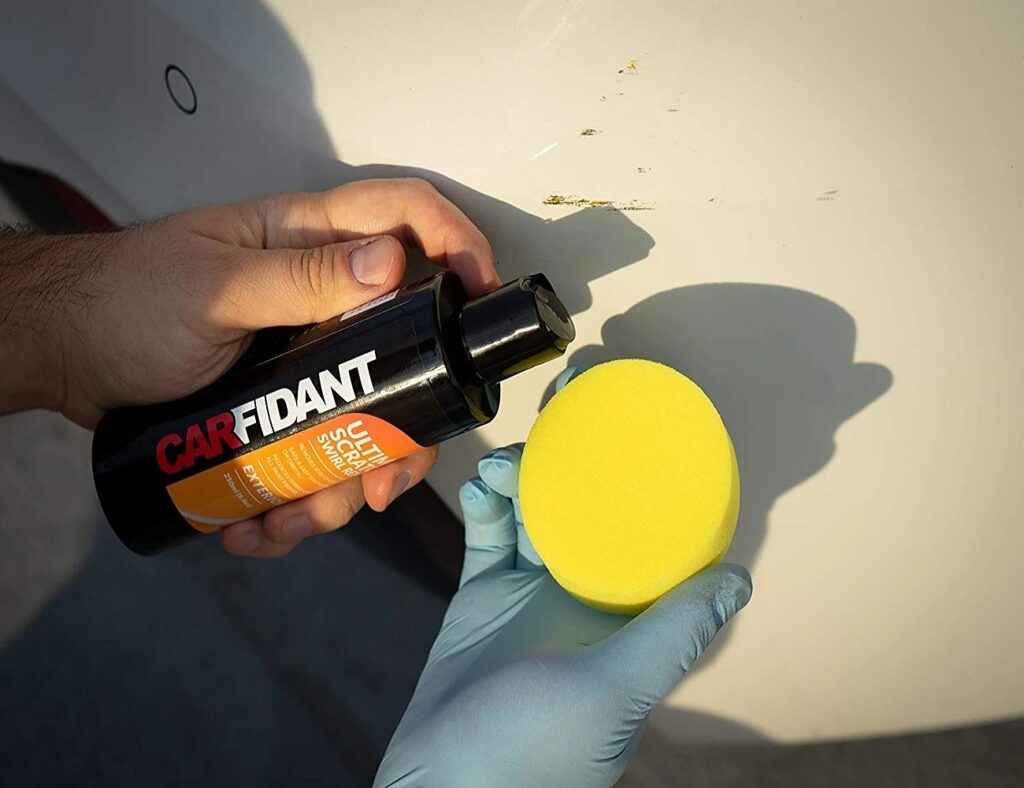
Before polishing, remove any minor blemishes
This is the defining step between amateur and professional auto detailers. Shine can be enhanced by polishing, but scratches won’t be removed. However, if you use a scratch remover kit on the scratches first, and then polish, you’ll obtain an even higher gloss.
Scratch and Swirl Remover by Carfidant is a quick and easy solution for minor imperfections like these. Inexpensive and easy-to-use, the kit consists of a buffer pad and a specially developed chemical that will restore your car’s luster and remove years of oxidation and scratches from its exterior.
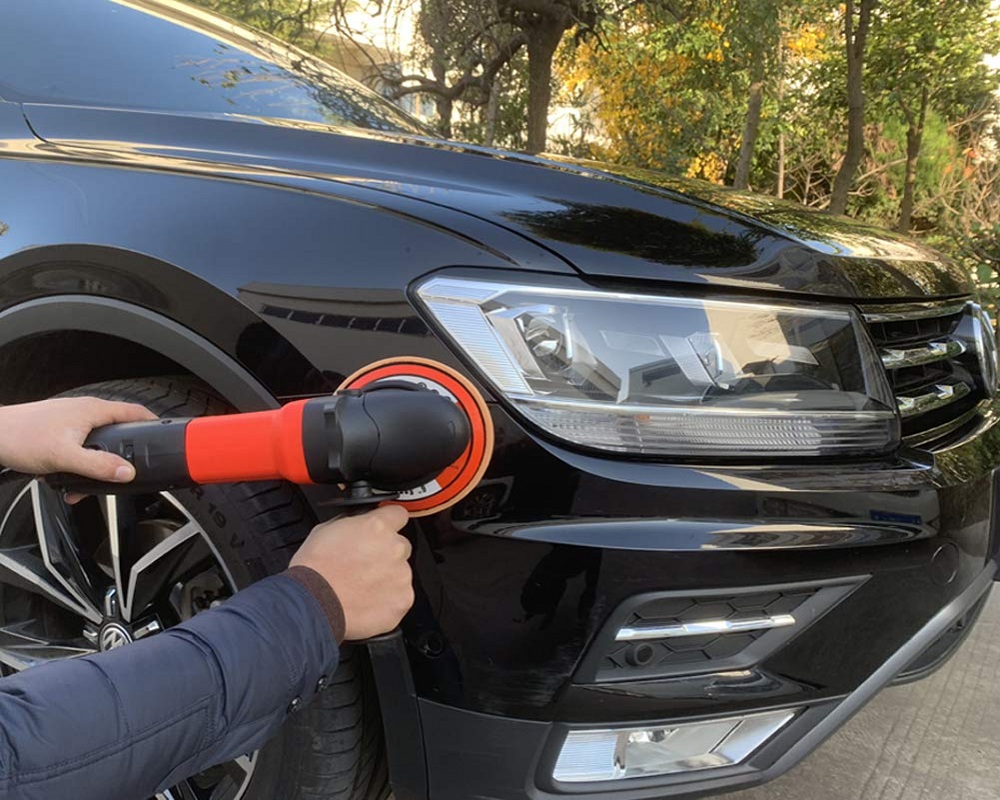
Buy a dual-action polisher
In the world of detailing, a dual-action polisher is an absolute must-have, but it is important to distinguish it from a high-speed buffer. If you leave the buffer in one spot for too long or press too hard, you risk having the paint burned off your automobile. Polishers are different. They move at slower speeds and oscillate as they rotate. In a matter of minutes, even a first-time polisher will have the hang of it. When you take the time to polish before you wax, you’ll notice a huge difference.
Another expert detailing tip: apply the polish to the machine’s pad. Then rub your paint with the pad. If you do that, the polish won’t fly off the pad when you pull the trigger.
The ZOTA Buffer Polisher is a safe and easy-to-use multi-speed polisher. The high-speed setting will eliminate paint flaws and oxidation, the medium setting will be used for polishing and cleaning, and the lowest level will be used for waxing and buffing. This one polishing tool will come in handy when you conduct your own detailing from now on.
Use synthetic wax
Antique automobiles look particularly good when finished with traditional paste waxes. However, they don’t create the same “wet look” as modern synthetic waxes and wear off much faster. When vehicle dealerships sell paint sealant, what they’re really doing is applying a high-quality synthetic wax, which you can do yourself for a fraction of the cost.
Use a wax applicator sponge to evenly coat small areas with synthetic wax, such as Mother’s California Gold Synthetic Wax Liquid.
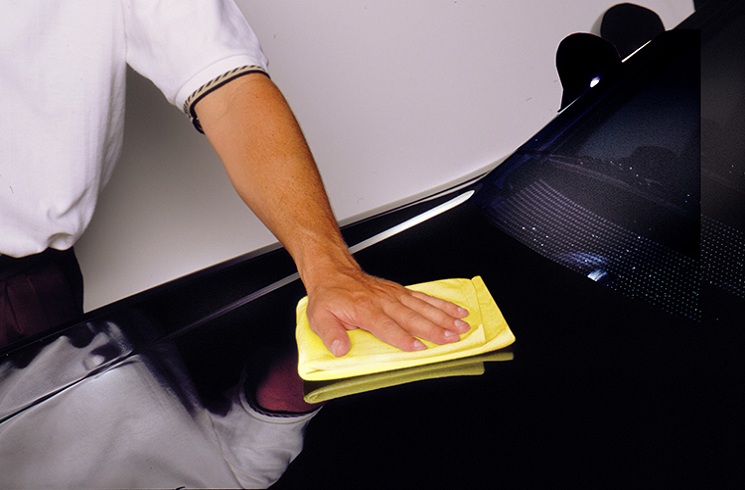
Use a microfiber towel to wipe away the wax haze
Car detailers all over the world would be lost without microfiber cloths. Use circular motions to wipe away the wax residue. If the towel becomes clogged with wax, you can refold it to a fresher part. When one towel becomes too heavy to carry, grab a second.
Keep a set of microfiber towels just for removing wax from your automobile. Chemical Guys’ Workhorse Professional Grade Microfiber Towels, available in a convenient three-pack, are a high-quality, scratch-free option for DIY auto detailing.
Start at the top
Do it yourself Car detailers typically begin by vacuuming the carpet, as it is the dirtiest and most satisfying aspect of the car’s interior right away. However, you will simply push dirt from the dashboard, seats, and door panels back into your freshly cleaned carpet. Expert detailers always begin from the ceiling and work their way to the carpet.
Having clean carpets isn’t always enough. Is it time to get some new floor mats that are more durable and easier to maintain? You should check out these rubber Armor All floor mats.
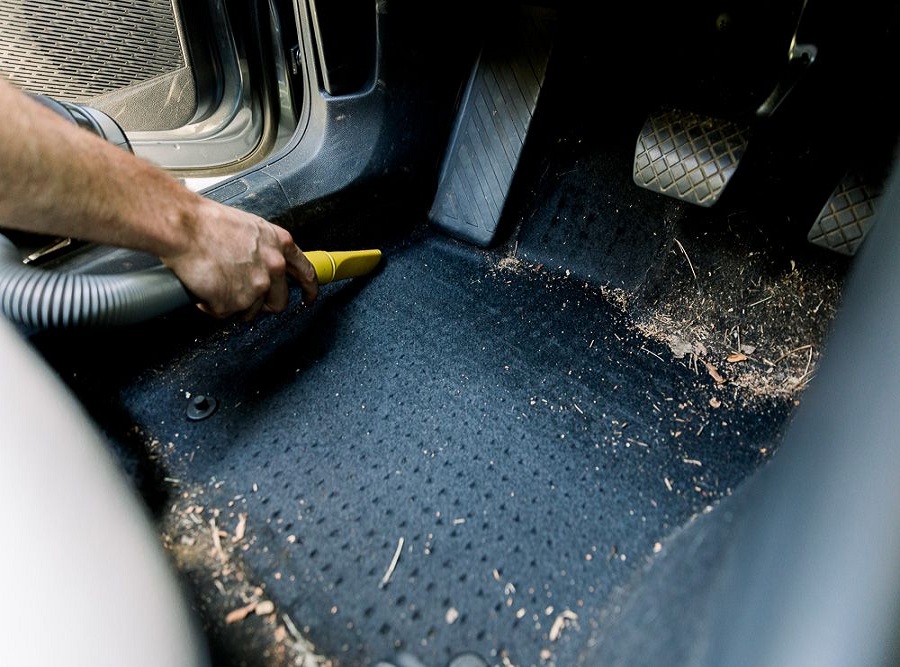
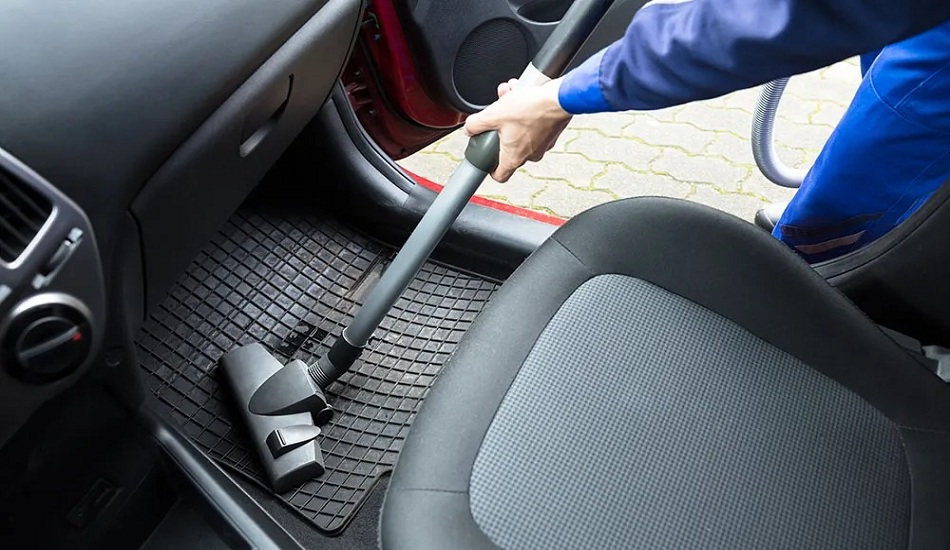
Suck it up as you go
Use a small detailer’s brush and a shop vacuum to clean all the cracks and crevices on your dashboard and center console. As you clean the floor, keep the shop vacuum wand close by to collect debris.
The nozzle attachments in this WORKSHOP wet/dry vacuum set are designed to reach into even the most inaccessible crevices of your vehicle.
Brush and vacuum the carpet
The carpet of a car is notorious for being a dirt magnet. It can’t be completely removed by vacuuming, no matter how hard you try. Professional detailers use a hard brush and scrape the carpet in addition to vacuuming to get rid of more dirt. The dirt particles will bounce to the surface, where you can vacuum them up.
If you want your do-it-yourself auto detail to go smoothly, it’s a good idea to keep a portable car vacuum, such as this one from ThisWorx, on hand.
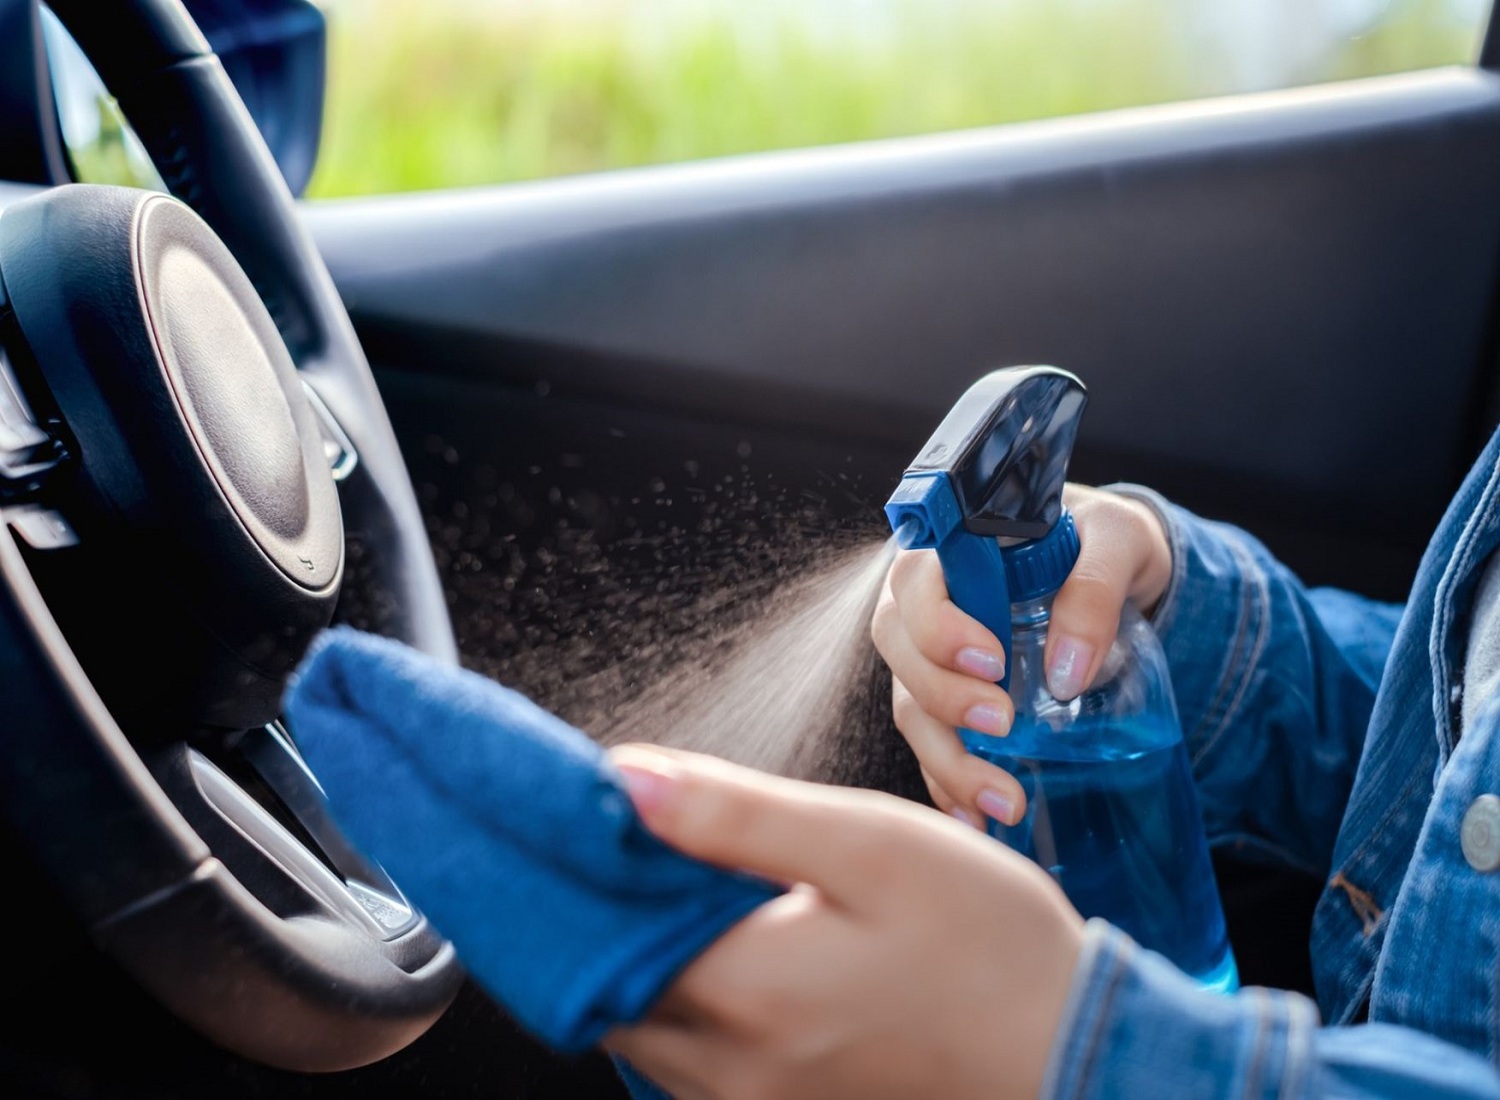
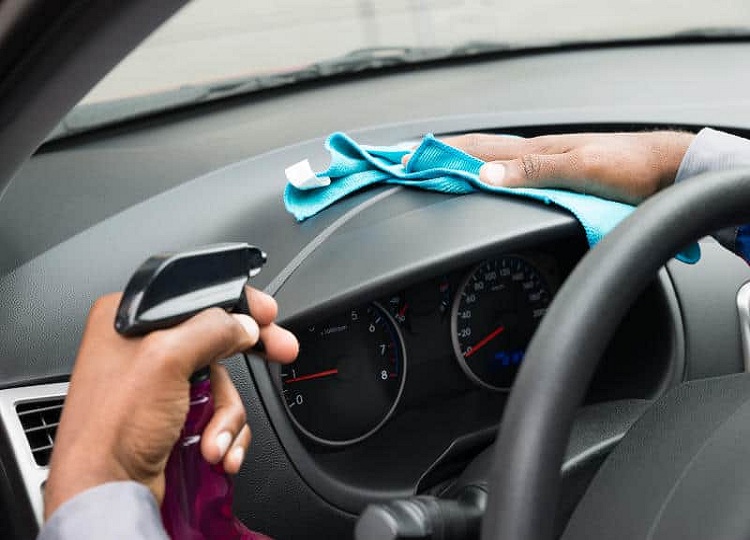
Protect your dashboard and vinyl with a non-silicone matte finish product
You’ll have to wipe your dashboard more frequently if you use a silicone dashboard protectant spray because it leaves a slippery layer. Additionally, a dashboard that is too glossy will reflect into the driver’s line of sight. Especially at night, your vision may be impaired by the reflection and glare.
This is why experts in the detailing industry use silicone-free matte finish protectants. They cut down on glare and still look beautiful.
Adam’s Matte Detailer is a simple-to-use matte finisher that leaves behind simply a pleasant aroma and a clean, matte finish with no shine on your interior surfaces.
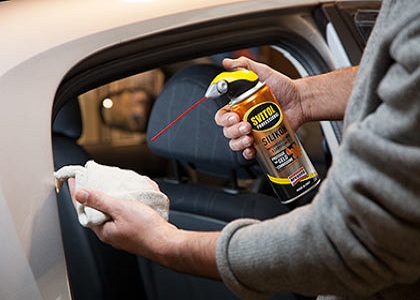
Lubricate door seals
As you cleaned the door, you probably wiped away the lubricants that keep the door seals functioning smoothly. Professional detailers will routinely use silicone spray to treat the seals.
Spray onto a cloth and use the cloth to wipe off the door seal from top to bottom. The silicone prevents the sealant from adhering to the door in both the summer and winter.
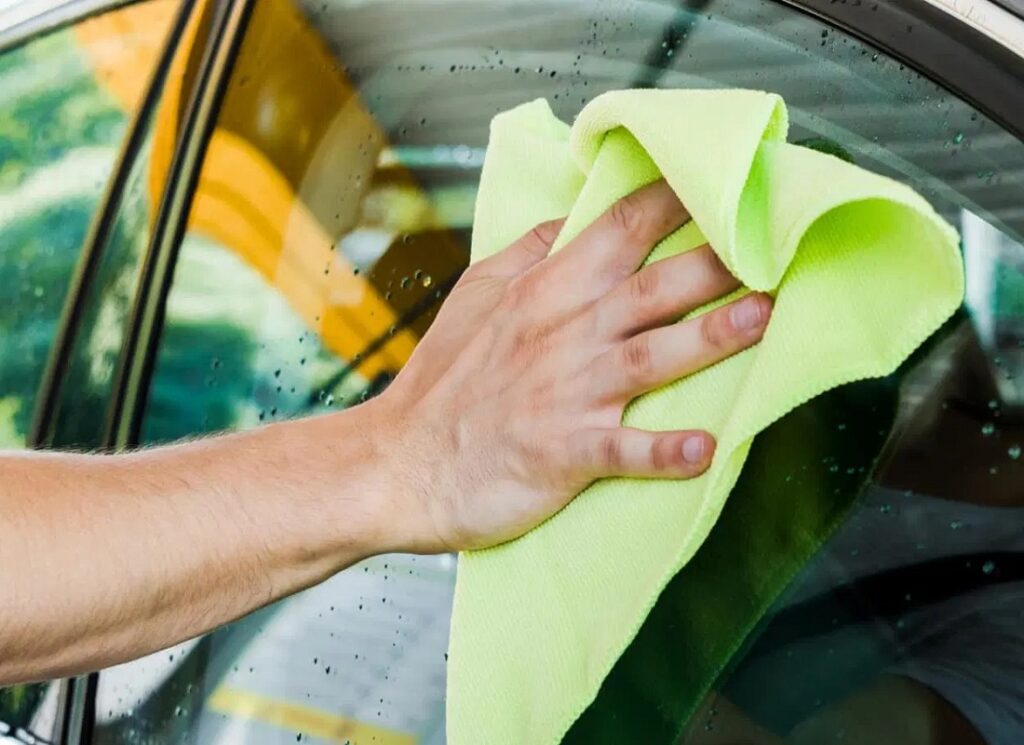
Finish with the glass
After cleaning the dashboard and applying vinyl protectant, you should only clean the inner windows again. That’s why professionals wait until the end to clean the windows. Cleaning the windows now will get rid of any residue left behind after cleaning or vinyl treatment, leaving your windows spotless.
If you want your windows to seem like they were cleaned by a pro, you shouldn’t settle with the cheap window cleaners sold in grocery stores. The glass will be spotless, residue-free, and unbelievably clean after being cleaned with this solution, and it won’t harm the tint on your windows too.