Sweet potatoes are more popular now than ever before. Not only do they have a lot of vitamins and fiber, but they also have less sugar than regular white potatoes.
And as they’ve become more popular, people have become more interested in growing them in their own backyard gardens.
And why not? Besides being good for your health, sweet potatoes are easy to plant, grow, and pick. Even better, because they are roots, they can be stored and used well into winter.
Here’s how to grow your own sweet potatoes, including how to make sweet potato slips, which can be used as “seeds.”
How To Grow Sweet Potato Slips – And Sweet Potatoes!
The way you plant sweet potatoes is different from how you plant regular potatoes. Usually, potatoes grow from “seed” taken from an already-grown potato.
The seeds of regular potatoes are actually a part of the tuber that has at least one “eye” or bud. When the eye is put in the ground, it grows stems and leaves.
But you can’t grow sweet potatoes from an eye or bud. You use the roots that grow from a sweet potato instead of any part of the potato.
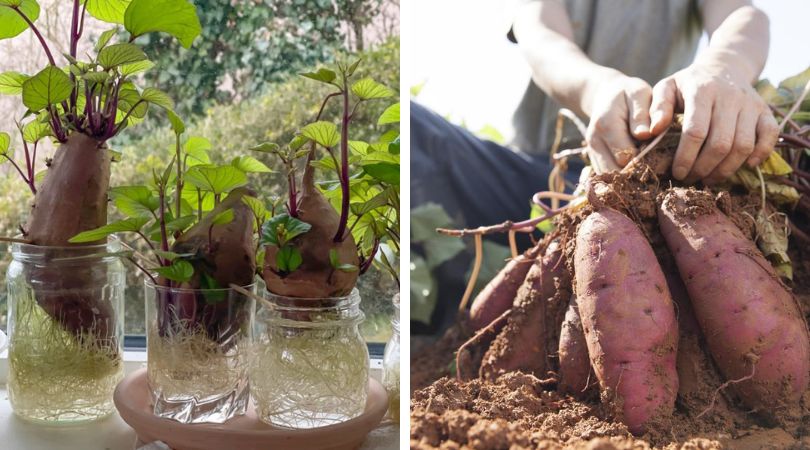
These roots, called slips, are easy to grow from a sweet potato that is already growing. In fact, it’s so easy that you can do it all on the windowsill in your kitchen or dining room.
Learn how to grow your own slips
Slips can be grown from an existing sweet potato in a number of tried and true ways. But for us, nothing is easier than the old trick with a toothpick, water, and a Mason jar.
First, start with a good organic sweet potato that is healthy. Why organic? Since sweet potatoes that aren’t organic are often treated with chemicals that stop them from sprouting.
You can leave the sweet potato whole, but we use bigger sweet potatoes and cut them in half to make two separate slip growing jars. We’ve tried both ways, but we always find that cutting the ends helps the sprouts grow faster.
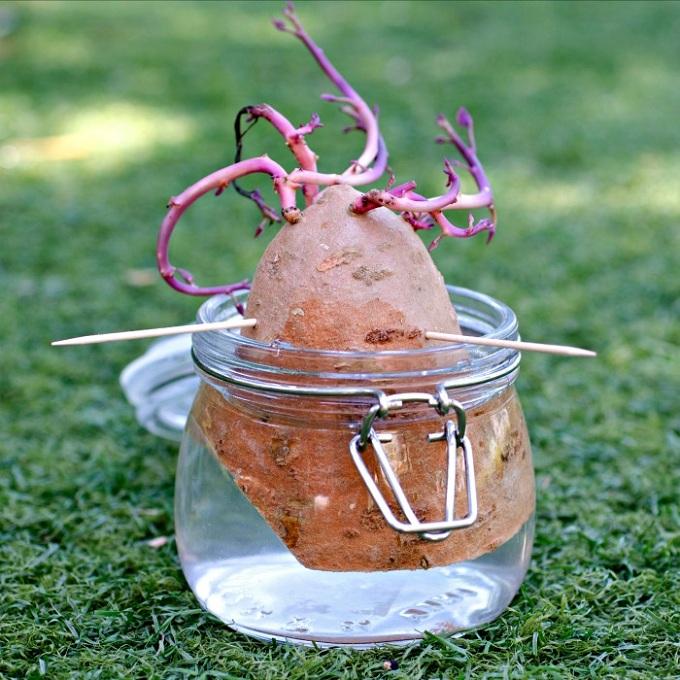
Next, stick a few toothpicks into the sweet potato just below the halfway point near the bottom. Set the toothpicks up in a line around the potato’s edge.
Finish by filling a mason jar with tap water (water that hasn’t been treated), then placing the sweet potato in the jar on toothpicks. Make sure that a little more than half of the potato is out of the water for the best results.
Now, put your jar in a warm, sunny window and wait for the magic to happen!
Creating Your Potato Slips
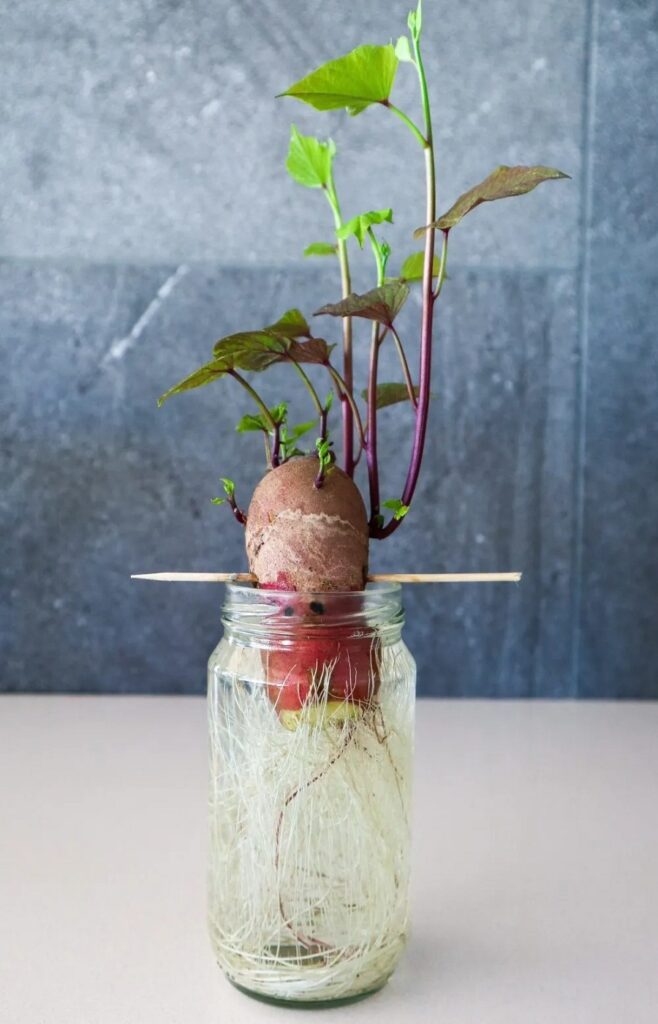
Under the water, the sweet potato will first grow a few stringy roots. Then, in a few weeks, stems and leaves will start to grow from the top.
Let the stems grow until they reach a length of about 4 inches. Then, carefully twist the base of the sweet potato to remove the stems. Be careful, but don’t worry if some of it breaks off.
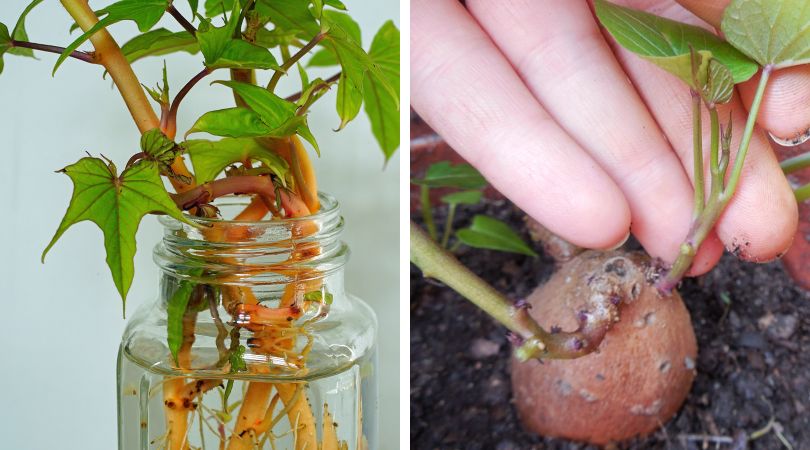
Next, put the bottom of the stems into a second jar of water. The stems will float a little, which is okay. Just make sure that the slips aren’t completely submerged.
In a few days, the tips will start to grow roots, and your slips will start to get taller. Let them keep growing and getting bigger until it’s time to plant.
The best part is that your original sweet potato will keep growing new slips in the same place where your old slips are growing. Using this method, you can make several rounds of slips before it’s time to plant.
Planting Sweet Potato Slips
Frost and cool weather are bad for sweet potatoes. Because of this, it is best to plant them when the soil has warmed up in late spring and there is no chance of frost.
There are different ways to plant sweet potatoes. We grow our sweet potatoes in crates, which we love because it’s so easy. But they can also be planted successfully in a regular garden or in raised beds.
Good soil is a must wherever you plant. Sweet potatoes do best in soil that is loose, full of compost, and has a lot of nutrients.
Place the slips 8 to 10 inches apart when you plant them. Slips should always be planted on top of a small hill of soil. This will keep them from sitting in water and keep them from going bad from too much water.
At least half of the slip should be buried to give the roots a lot of room. Make sure the soil is loose and full of nutrients if you are planting in raised beds or a traditional garden. It’s always a good idea to add compost to soil to help roots grow well.
In a few weeks, the leaves should start to grow like crazy, and your crop of sweet potatoes will be off and running!
Fertilizing and Water
Give the slips a lot of water until they grow roots in the soil. Check the slip every day for the first few days to see if it is drying out and add water if needed.
Water is important, but don’t water too much. Most of the time, plants turn yellow when they get too much water.
Once the sweet potatoes have been growing for a few weeks, a few applications of liquid fertilizer will help them a lot. You can use compost tea, worm casting tea, or a good liquid organic fertilizer.
For the best results, apply after two to three weeks in the soil and then again a few weeks later. Once the plants have started to grow, stop fertilizing them because it can make a lot of leaves grow on top but less potatoes grow in the ground.
By mid-fall, the tips of the vines on most plants will start to turn yellow. This means they’re ready to be picked. Dig slowly from the edges to keep the tubers from getting damaged.