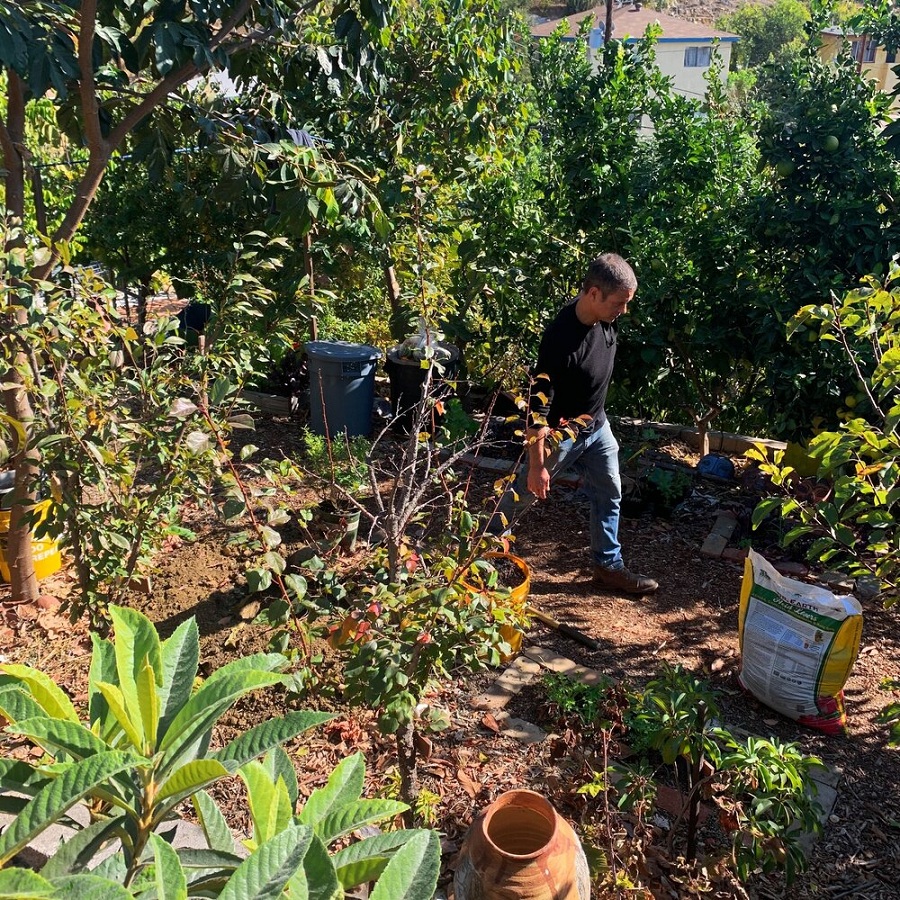
If you’ve ever driven down a back road in a developing, tropical country, you’ll notice that many of the locals grow a large portion of their own food. You may have also noticed that their food gardens aren’t entirely made up of small annual vegetables planted in straight rows like ours. They usually have a wild look, with edible trees, shrubs, vines, and ground covers all growing together as if Mother Nature had planted the garden herself. These are literally food forests.
Food forests are comparable to the ultimate organic garden. Is it necessary to till, weed, fertilize, or irrigate a forest? Nope. And that is the goal.
There is no need to till them because they are mostly perennial crops. Without tilling, the natural soil structure is preserved, preventing topsoil loss and enabling all the little microbes and soil critters to do their jobs, cycling nutrients and maintaining fertility. Trees and shrubs are more resilient to drought because of their deep roots, and they also shade the ground beneath them, preventing evaporation and keeping the lower plants lush and moist in a self-sustaining, environmentally friendly system.
Read on to learn how to start your own food forest:
CHOOSE PLANTS
The initial step in starting a food forest is choosing plants. Because only the largest plants can reach the sun, most common fruiting trees and shrubs are fair game. Most of the time, the smaller plants need to be able to handle more shade because they will be in the understory. However, you can leave a few sunny patches here and there, like small forest clearings, to accommodate species that require more light.
The best time to start is in the winter, when most edible trees, shrubs, vines, and herbaceous plants are dormant and can be bought and planted. This is better for the plants and your wallet. This is because they are sold in “bare root” form at this time of year, meaning without soil or a pot, which gives the roots a more natural structure and saves nurseries money. Bare root plants are typically ordered in January or February for planting in early March, or as soon as your area’s ground thaws. Naturally, you should stick to species that are well-adapted to your area.
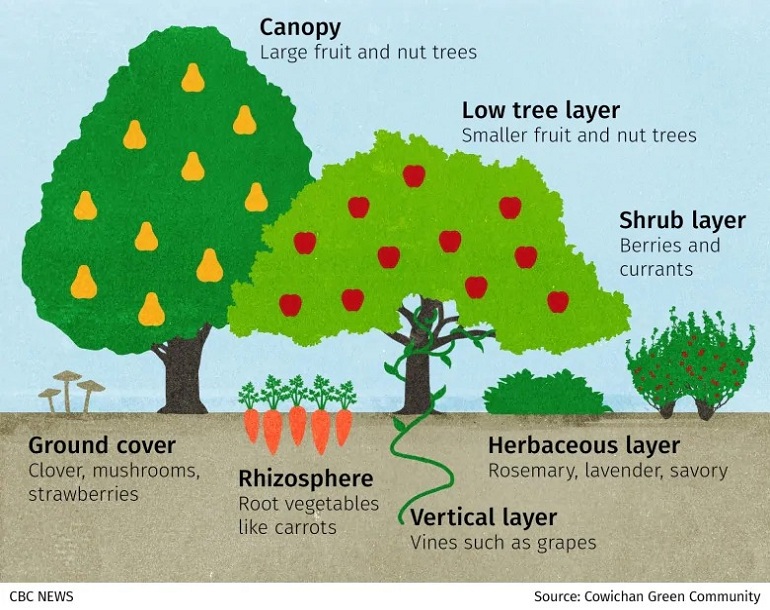
- CANOPY: This layer is primarily for large nut trees that require full sun all day, such as pecans, walnuts, and chestnuts, all of which mature to 50 feet or more in height.
- UNDERSTORY TREES: This layer contains the majority of fruit trees and smaller nut trees such as filberts. Native North American species such as black mulberry, American persimmon, and pawpaw are the most shade tolerant fruit trees, but several other fruit trees will produce a respectable crop in partial shade.
- VINES: The most well-known edible vines are grapes, kiwis, and passion fruit, but there are many other less common species to consider, some of which are shade tolerant, such as akebia (edible fruit), chayote (a perennial squash), and groundnuts (perennial root crop). Kolomitka kiwi, a close relative of supermarket fuzzy kiwis, is one of the most shade-tolerant vines.
- SHRUBS: A wide variety of fruiting shrubs, including gooseberries, currants, service berries, huckleberry, elderberry, aronia, and honey berry, as well as the “super foods” sea berry and goji, thrive in partial shade. Blackberry and blueberry bushes will thrive in the United States.
- HERBACEOUS PLANTS: This group includes not only plants commonly thought of as herbs—rosemary, thyme, oregano, lavender, mint, and sage are just a few of the top perennial culinary herbs to consider for your forest garden—but is a catch-all term for any leafy plant that goes dormant below ground in winter and re-sprouts from its roots in spring. Perennial vegetables such as artichokes, rhubarb, asparagus, and “tree collards” fit into this layer.
- GROUND COVERS: These plants are perennials that spread horizontally to colonize the ground plane. Alpine strawberries (a shade-tolerant delicacy), sorrel (a French salad green), nasturtiums (with edible flowers and leaves), and watercress (requires wet soil) are all edible examples that tolerate part shade.
- RHIZOSPERE: This is a term for root crops. Because the top portion of a root crop can be a vine, shrub, ground cover, or herb, calling it a separate layer is a bit misleading, but it’s Hart’s way of reminding us to consider the food-producing potential of every possible ecological niche. Most root crops are sun-loving annuals, so for shade-tolerant varieties, look to more obscure species like the fabled Andean root vegetables oca, ulluco, yacon, and mashua.

PREPARE THE GROUND
Choose a location for your forest garden that is open and sunny. It can be as small as 100 square feet, with one fruit tree and a variety of smaller plants, or as big as many acres. Agroforestry is a term used to describe forest gardening on a larger, commercial scale. Commercial agroforestry is used to grow a variety of tropical crops, including coffee and chocolate, though it is rare in North America (other than in the context of timber plantations).
Unlike a conventional vegetable garden, a forest garden does not require the ground to be tilled and shaped into beds. Instead, as if you were planting ornamental shrubs and trees, dig a hole for each individual plant. If the soil is poor in quality, you may want to “top-dress” the entire planting area with several inches of compost before planting.
Raised beds are especially useful in food forests where drainage is an issue. Instead of making the effort to build traditional raised beds out of wood, you could sculpt the earth into low, broad mounds at the location of each tree. Smaller plants can then be planted along the mounds’ slopes. A different way to do this is to shape the land into long, narrow “swales” that have a raised berm (for a well-drained planting area) and a wide, shallow ditch (to collect rainwater runoff and force it into the soil beneath the planting berm).
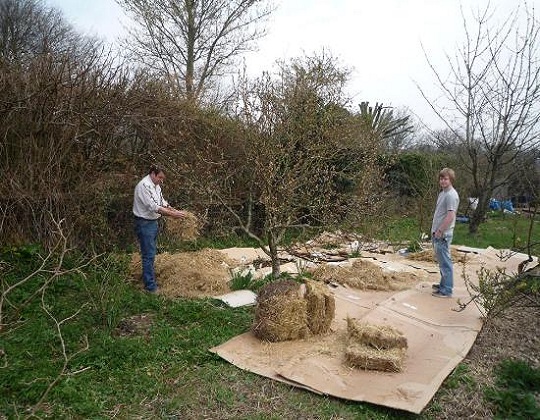
Prior to planting, remove any weeds, grass, or other existing vegetation. This can be done manually or by smothering them under “sheet mulch,” a permaculture technique in which sheets of cardboard are overlaid with a few inches of mulch on top of the vegetation, depriving the plants for light and causing them to compost in place. To add extra nutrients, compost can be added as a layer between the cardboard and the mulch. Permaculturists usually use sheet mulching and swales together to improve the area before planting.
Brush away the mulch and cut holes in the cardboard just large enough to dig a planting hole at the location of each plant when you’re ready to plant. Then, recirculate the mulch around the newly installed plant. Maintaining a deep mulch layer is essential for preventing weeds, conserving soil moisture, and increasing organic matter—all of which will assist your food forest in being self-sustaining and self-sufficient.

PLANT
The following step is to place your plants in the landscape. Plant the tallest species (i.e., the ‘canopy’ plants) at the northern end of the planting area, with progressively smaller plants moving south. Taller plants will cast less shade on smaller ones this way, especially at the start and end of the growing season when the days are shorter and the sun is lower in the sky.
Of course, truly shade tolerant plants can be interspersed throughout the forest garden’s understory. Once the large trees have matured, you might even consider cultivating mushrooms in the shadiest areas. Edible vines can be planted on any accessible fences, arbors, or walls, and you can also train vines up trees, just like Mother Nature does—just make sure the tree is significantly larger than the vine to avoid the tree being smothered.
If you want to include sun-loving annual vegetables, the edges of the food forest are ideal. Also, keep in mind that large trees take decades to mature, so there is plenty of sunlight in the early years of a food forest. Plant sun-loving species in the open spaces between trees, then replace them as the forest matures with more shade-tolerant plants.


